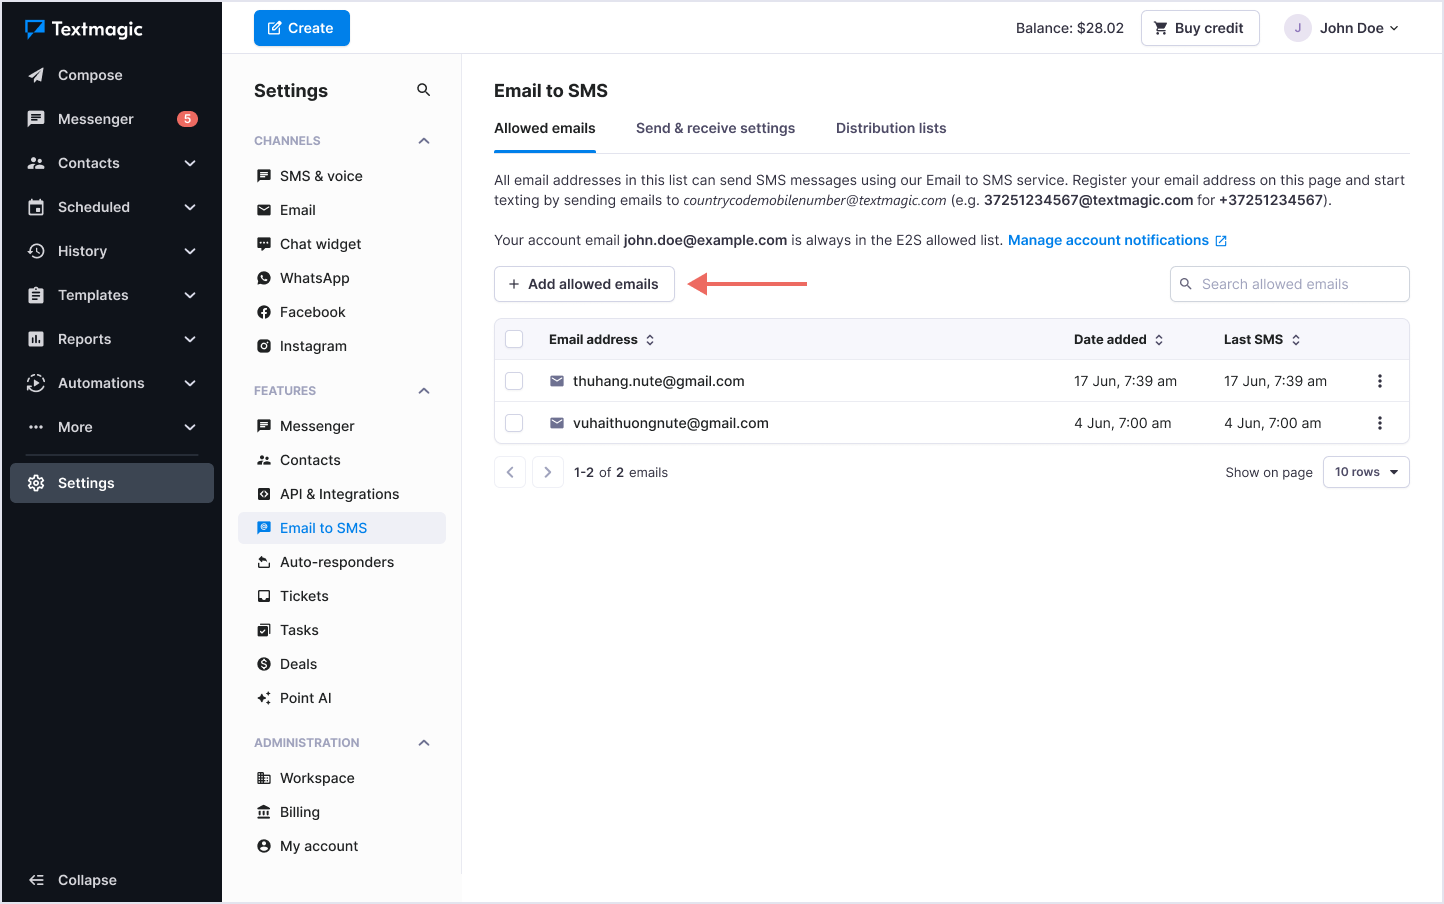
Set up Email to SMS allowed emails
First you need to configure your Email to SMS settings and add allowed emails. These are the email addresses that are allowed to send Email to SMS messages using your Textmagic account.
Set up Email to SMS and add allowed emails
- Navigate to Services -> Email to SMS.
- Click the Add allowed emails button.
- Add email addresses that you own or control – one per line.
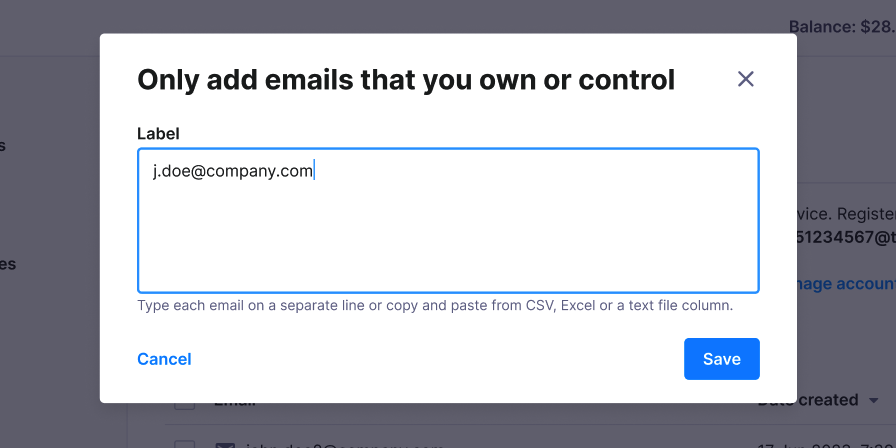
Please note: If an email address does not belong to you, we recommend you use an SMS Distribution List instead of Email to SMS.
Your emails will now appear in your Allowed emails list. You will be able to see when each email was added to the list and when the last message was sent.
Edit settings or delete an allowed email address
- Navigate to Services -> Email to SMS.
- Find the email address you want to change.
- Click the More icon.
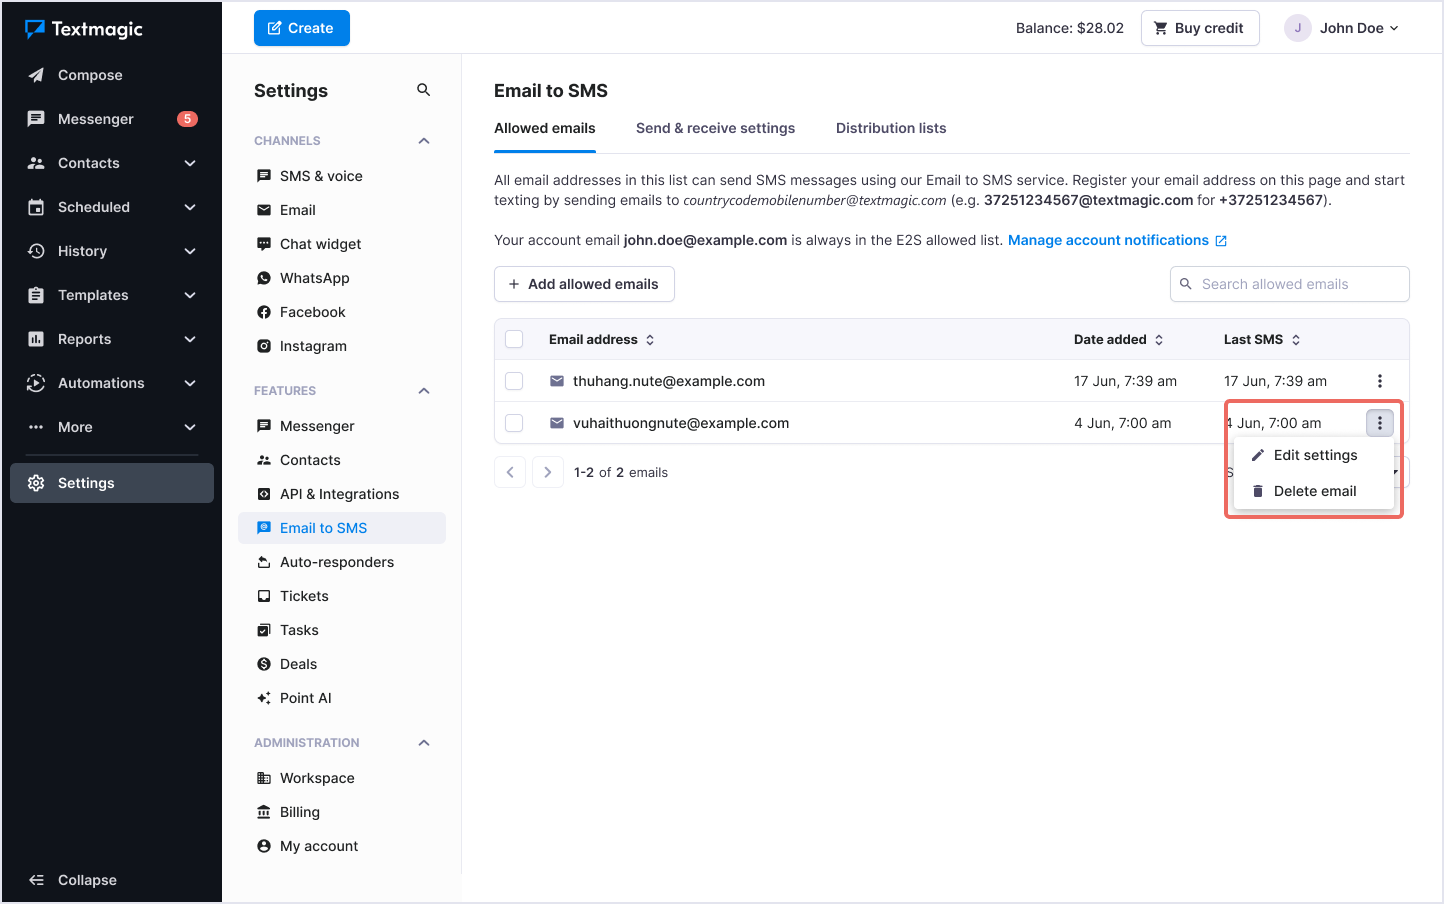
- Edit the settings or delete the email.
- Click Save.
After you have added your email addresses to the Email to SMS allowed list, you can configure send and receive settings.
Learn how to send and receive SMS using your email address.
Please note: It is not possible to send a sub-account invitation to an email address that is added to the Email to SMS allowed list. In that case, please delete the email address and then invite a team member if needed.
Was this post helpful?
Let us know if you liked the post. That’s the only way we can improve.