Grow your contacts using compliant subscribe forms
Putting one of our subscribe forms on your website will allow you to collect contacts compliantly, obtain user consent, and grow your customer database securely.
After embedding a form on your website or blog, all the mobile phone numbers and email addresses collected will be automatically added to your Textmagic contacts in the List of your choice. This enables you to send texts to anyone who has opted-in with just a few clicks.
Learn more about other acceptable consent methods for SMS messaging.
Online subscribe form requirements
To comply with 10DLC, toll-free verification requirements and ensure proper consumer consent, as per the CTIA guidelines, the subscribe (opt-in) form must include two separate checkboxes:
- Consent for general text messages: This checkbox allows users to opt-in to receive informational, non-marketing messages such as service updates, notifications, and account-related messages.
- Consent for marketing text messages: A distinct and separate checkbox must be included for users to explicitly opt-in to promotional and marketing messages. This ensures compliance with TCPA and FCC regulations, which require express written consent for marketing communications.
Both checkboxes must be unchecked by default, and users should be able to update or revoke their consent at any time.
For 10DLC registration, it’s important to include “Messaging Terms” in your Terms of Service,
and clearly state in your Privacy Policy that customer information will not be shared or sold.
Example documents for reference:
• Example Privacy Policy
• Example Terms of Service (Messaging Terms)
Create subscribe form
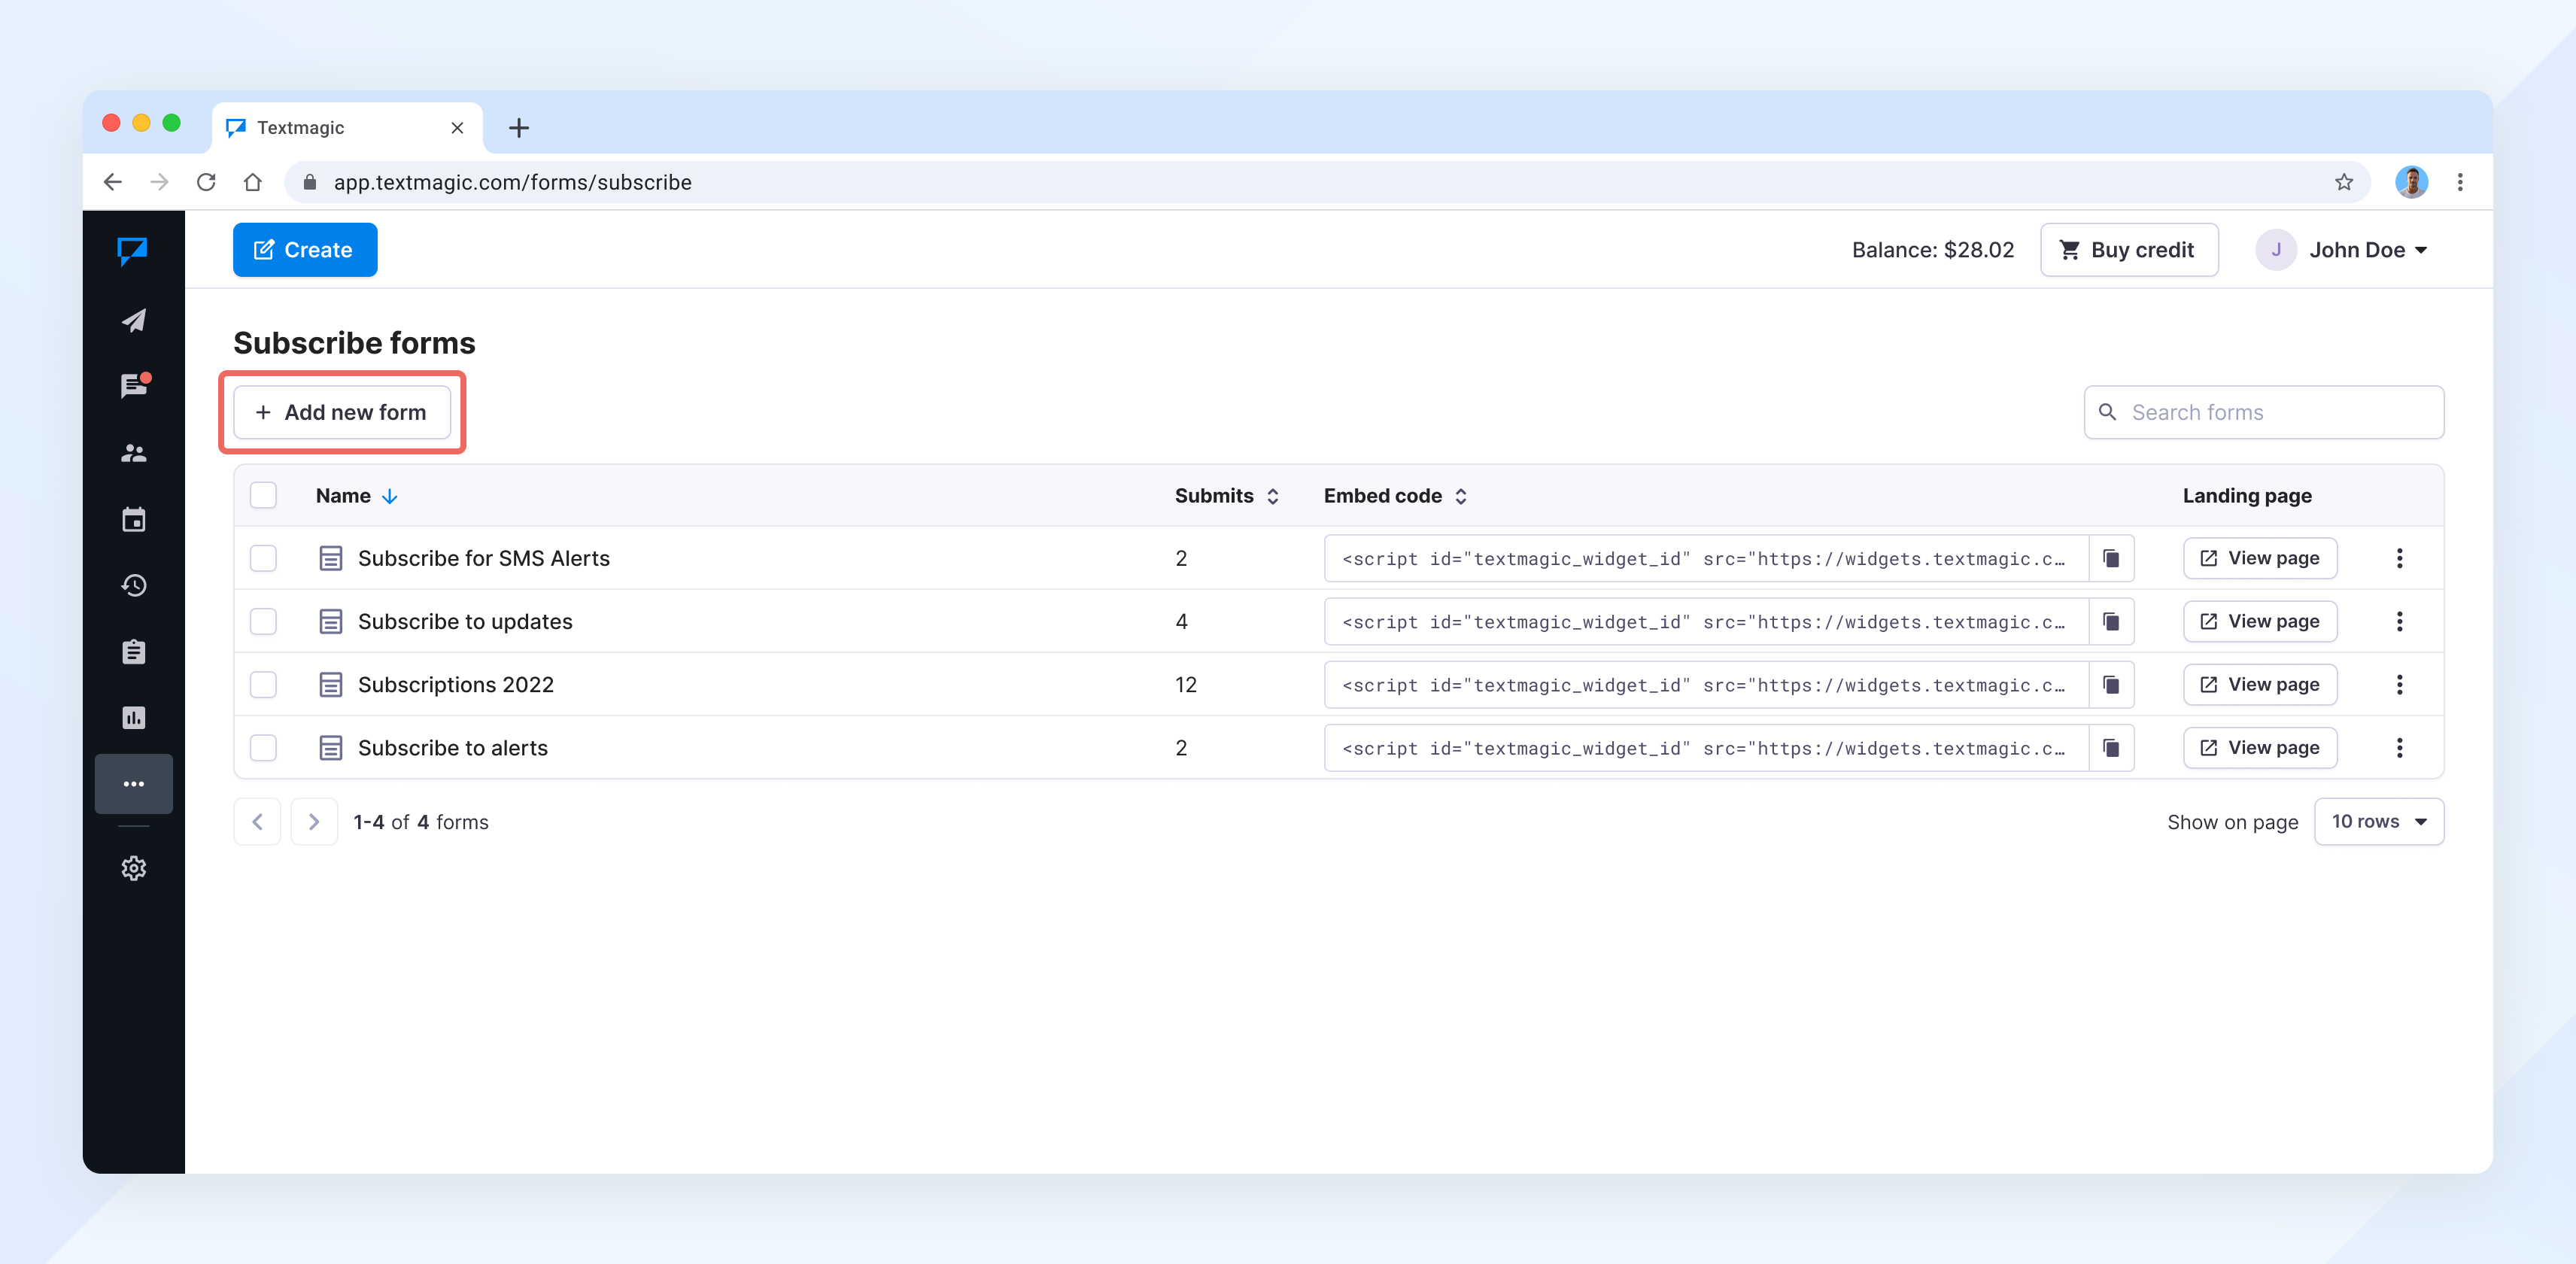
- Navigate to More -> Forms.
- Click Add new form.
- Enter the form name and select your use case. Click Create.Note: We’ll automatically pre-create a compliant form with proper headings and consent boxes.
You’ll just need to add your company logo and links to your Privacy Policy and Terms of Service.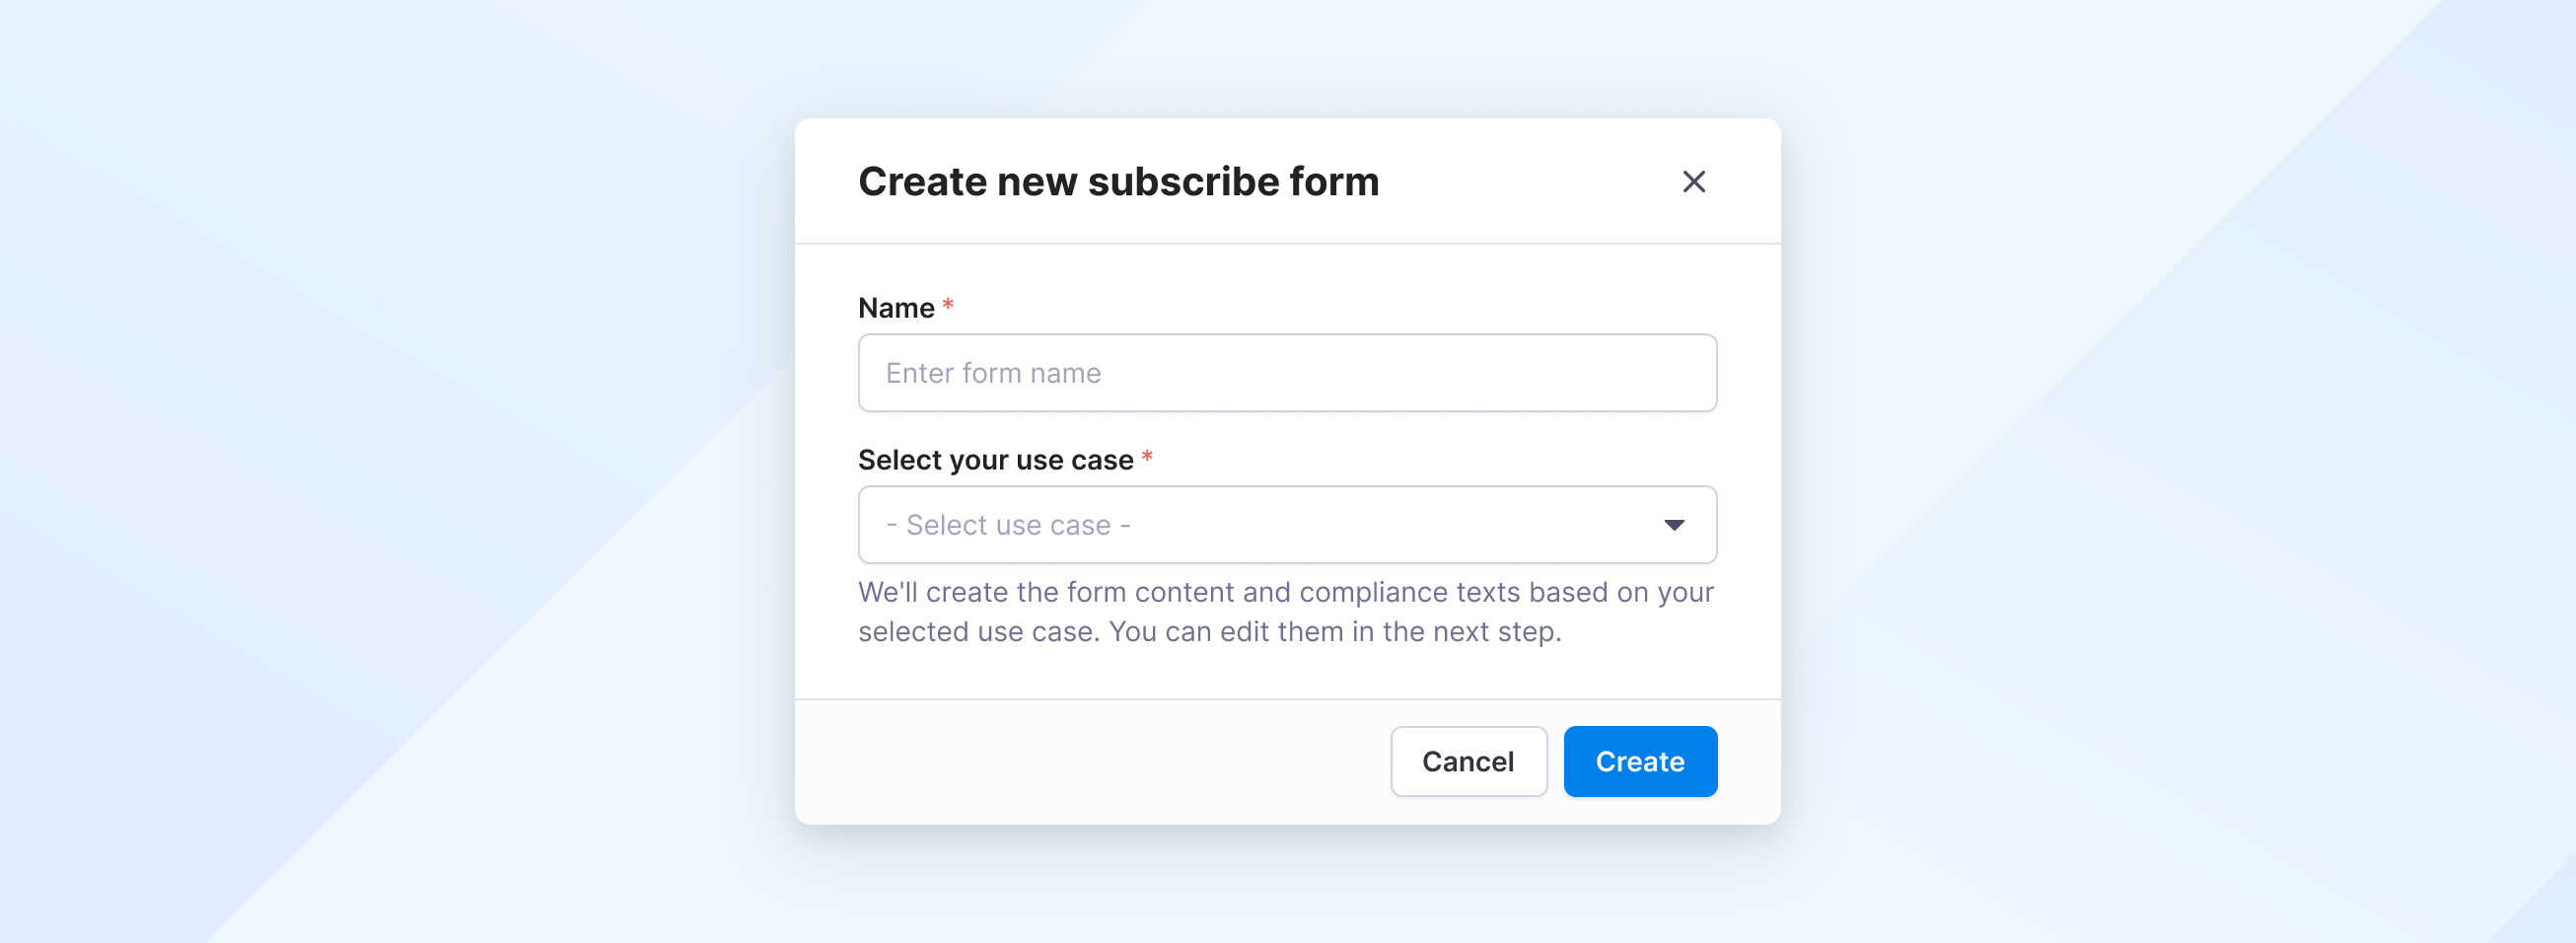
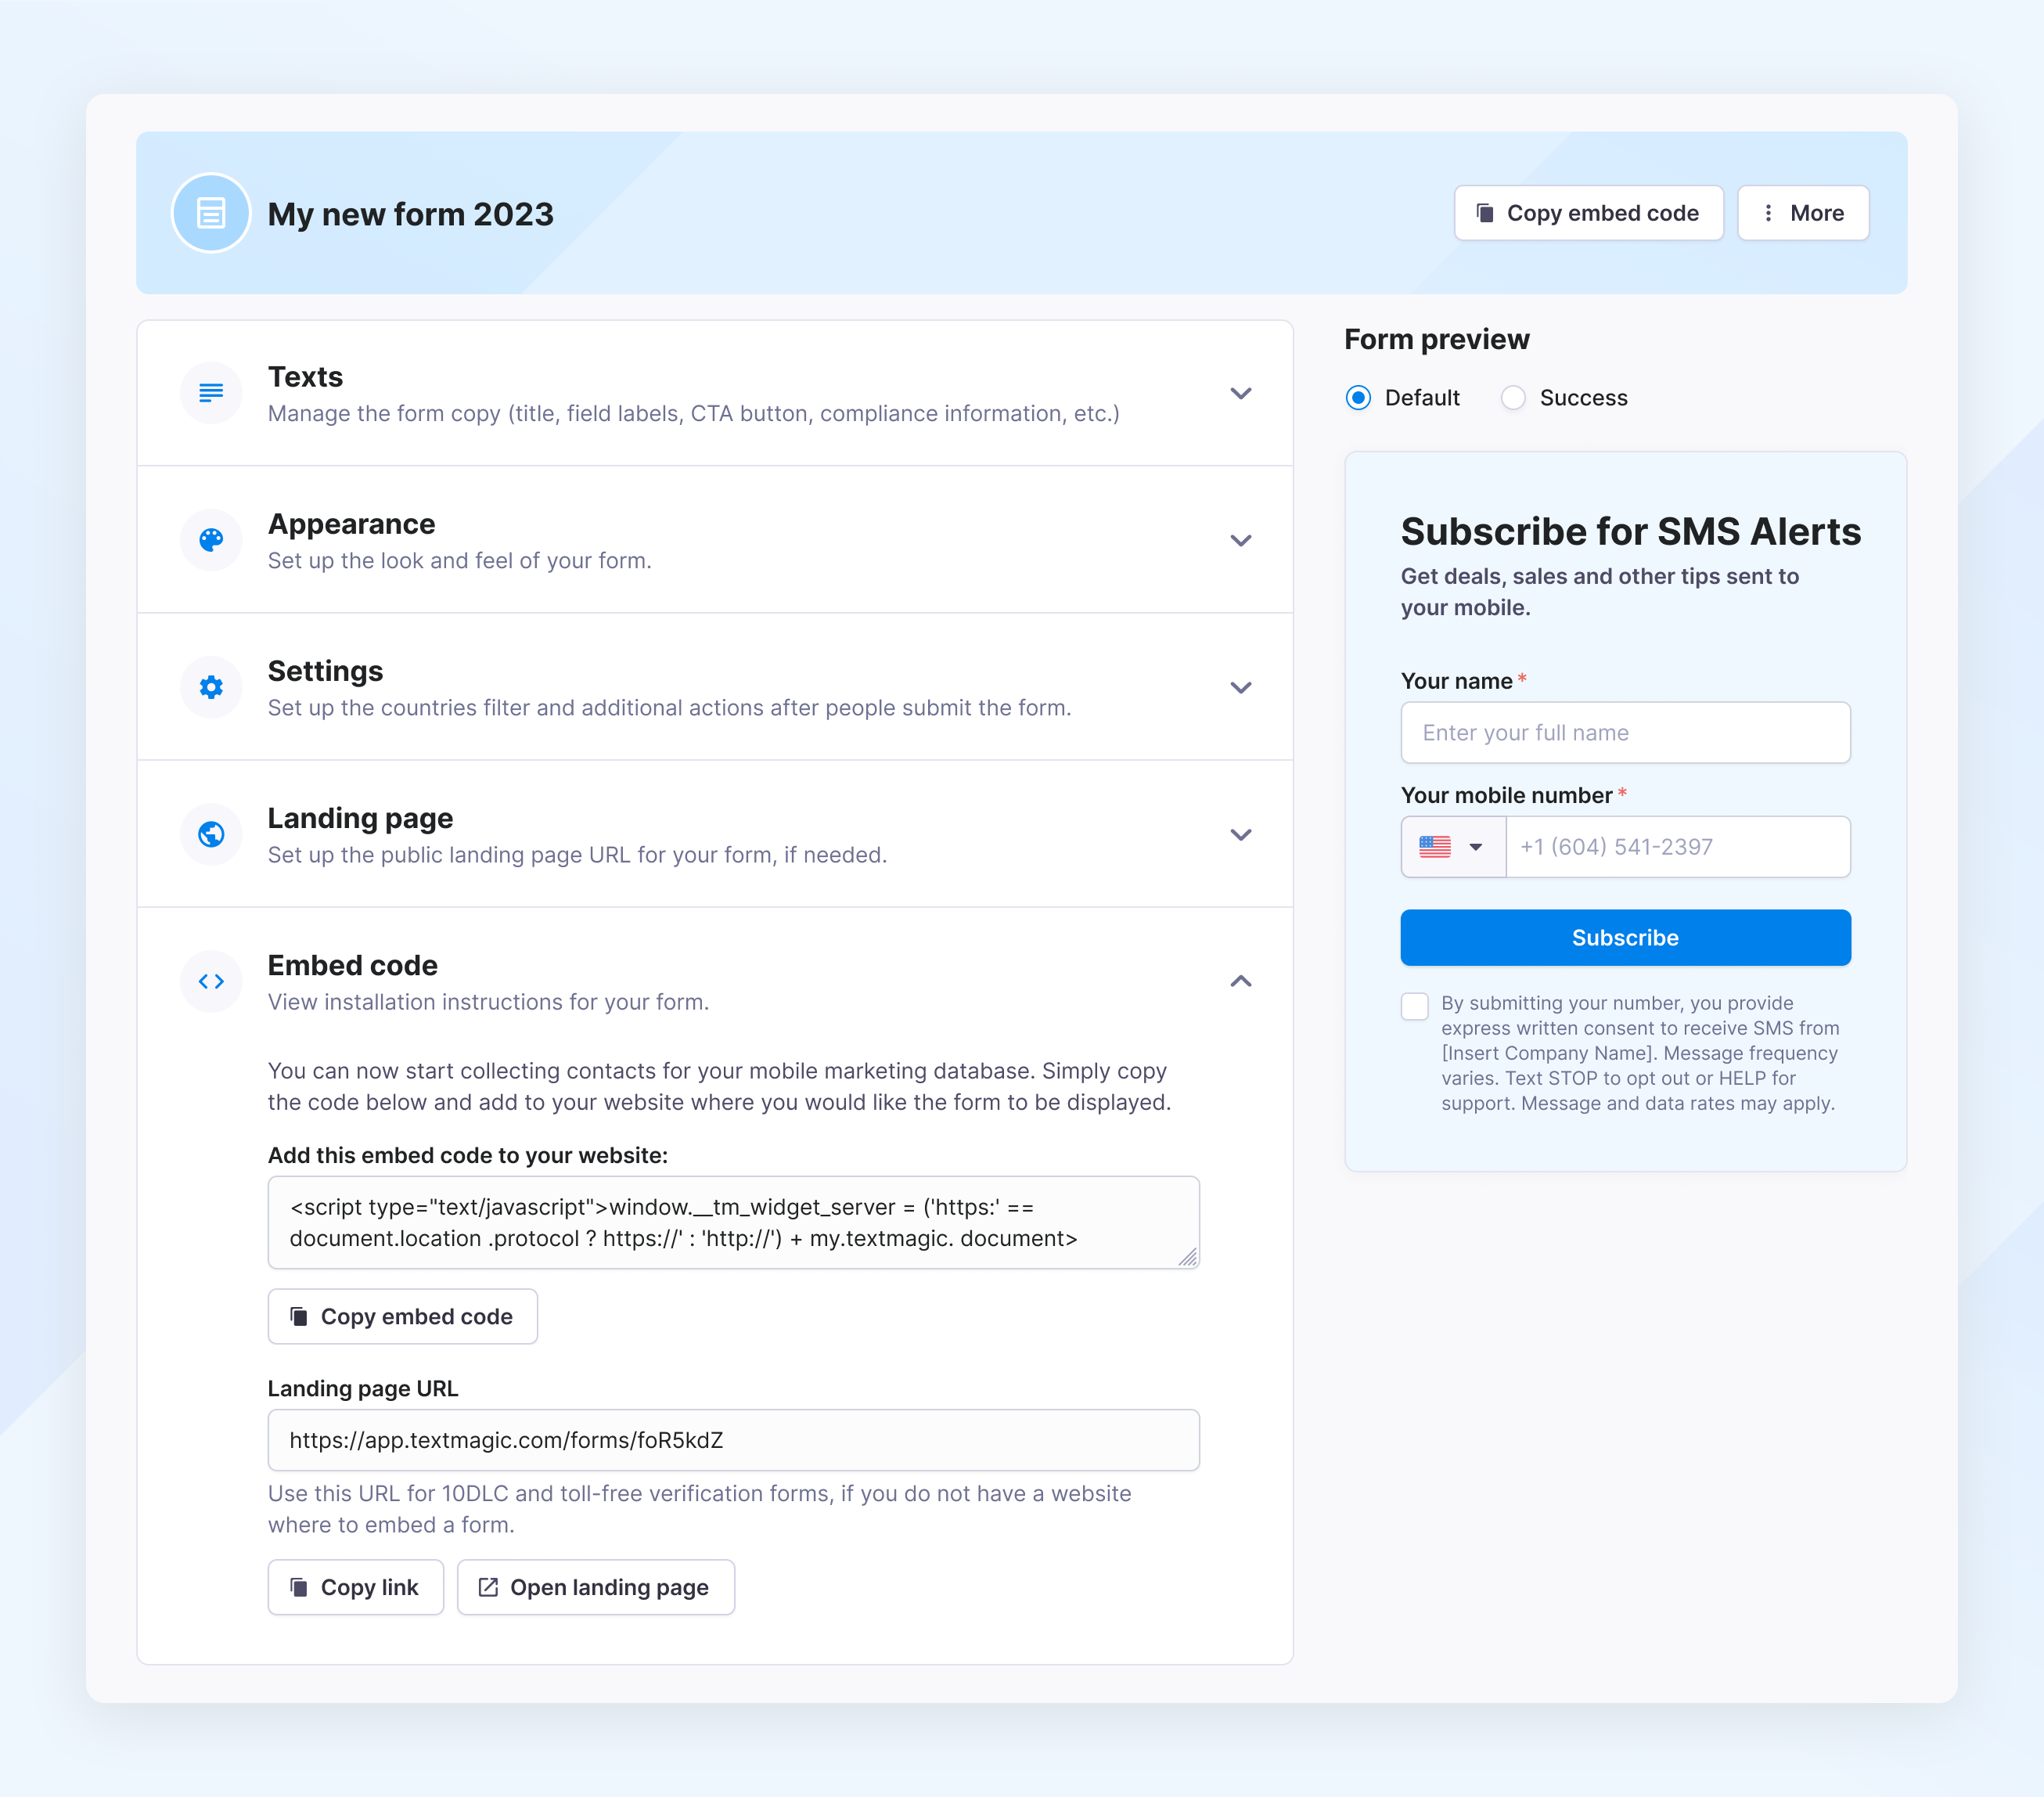
- Set up your form copy:
- Enter a form title. Give it an engaging, exciting and eye-catching name.
- Type a description – something that will appeal to potential customers and persuade them to enter their mobile number.
- If required, change the titles of the name and mobile phone input labels.
- User consent and compliance – enable checkboxes to ensure legal compliance, obtain explicit user permission, and protect your business from regulatory issues.
- Select the form appearance:
- Choose the color theme – light, dark, or blue. Also you can create a custom theme.
- Edit the width and height of the form to fit your website. If you are not sure how big the form should be, please consult your website administrator.
- Select the form font.
- Review and update other settings:
- Targeting – click Allowed countries and add the countries where you wish to collect subscribers from.
- Subscribers list – select a list for your potential subscribers.
- Opt-in confirmation – enable an automatic auto-reply.
- Add your organization’s logo if you plan to use the form for 10DLC or toll-free number registrations.
- If everything looks good, click Save changes.
- Copy the embed code and add it to your site where you want the form to be displayed.
Edit a form
- Navigate to More -> Forms.
- Click Edit form.

Delete a form
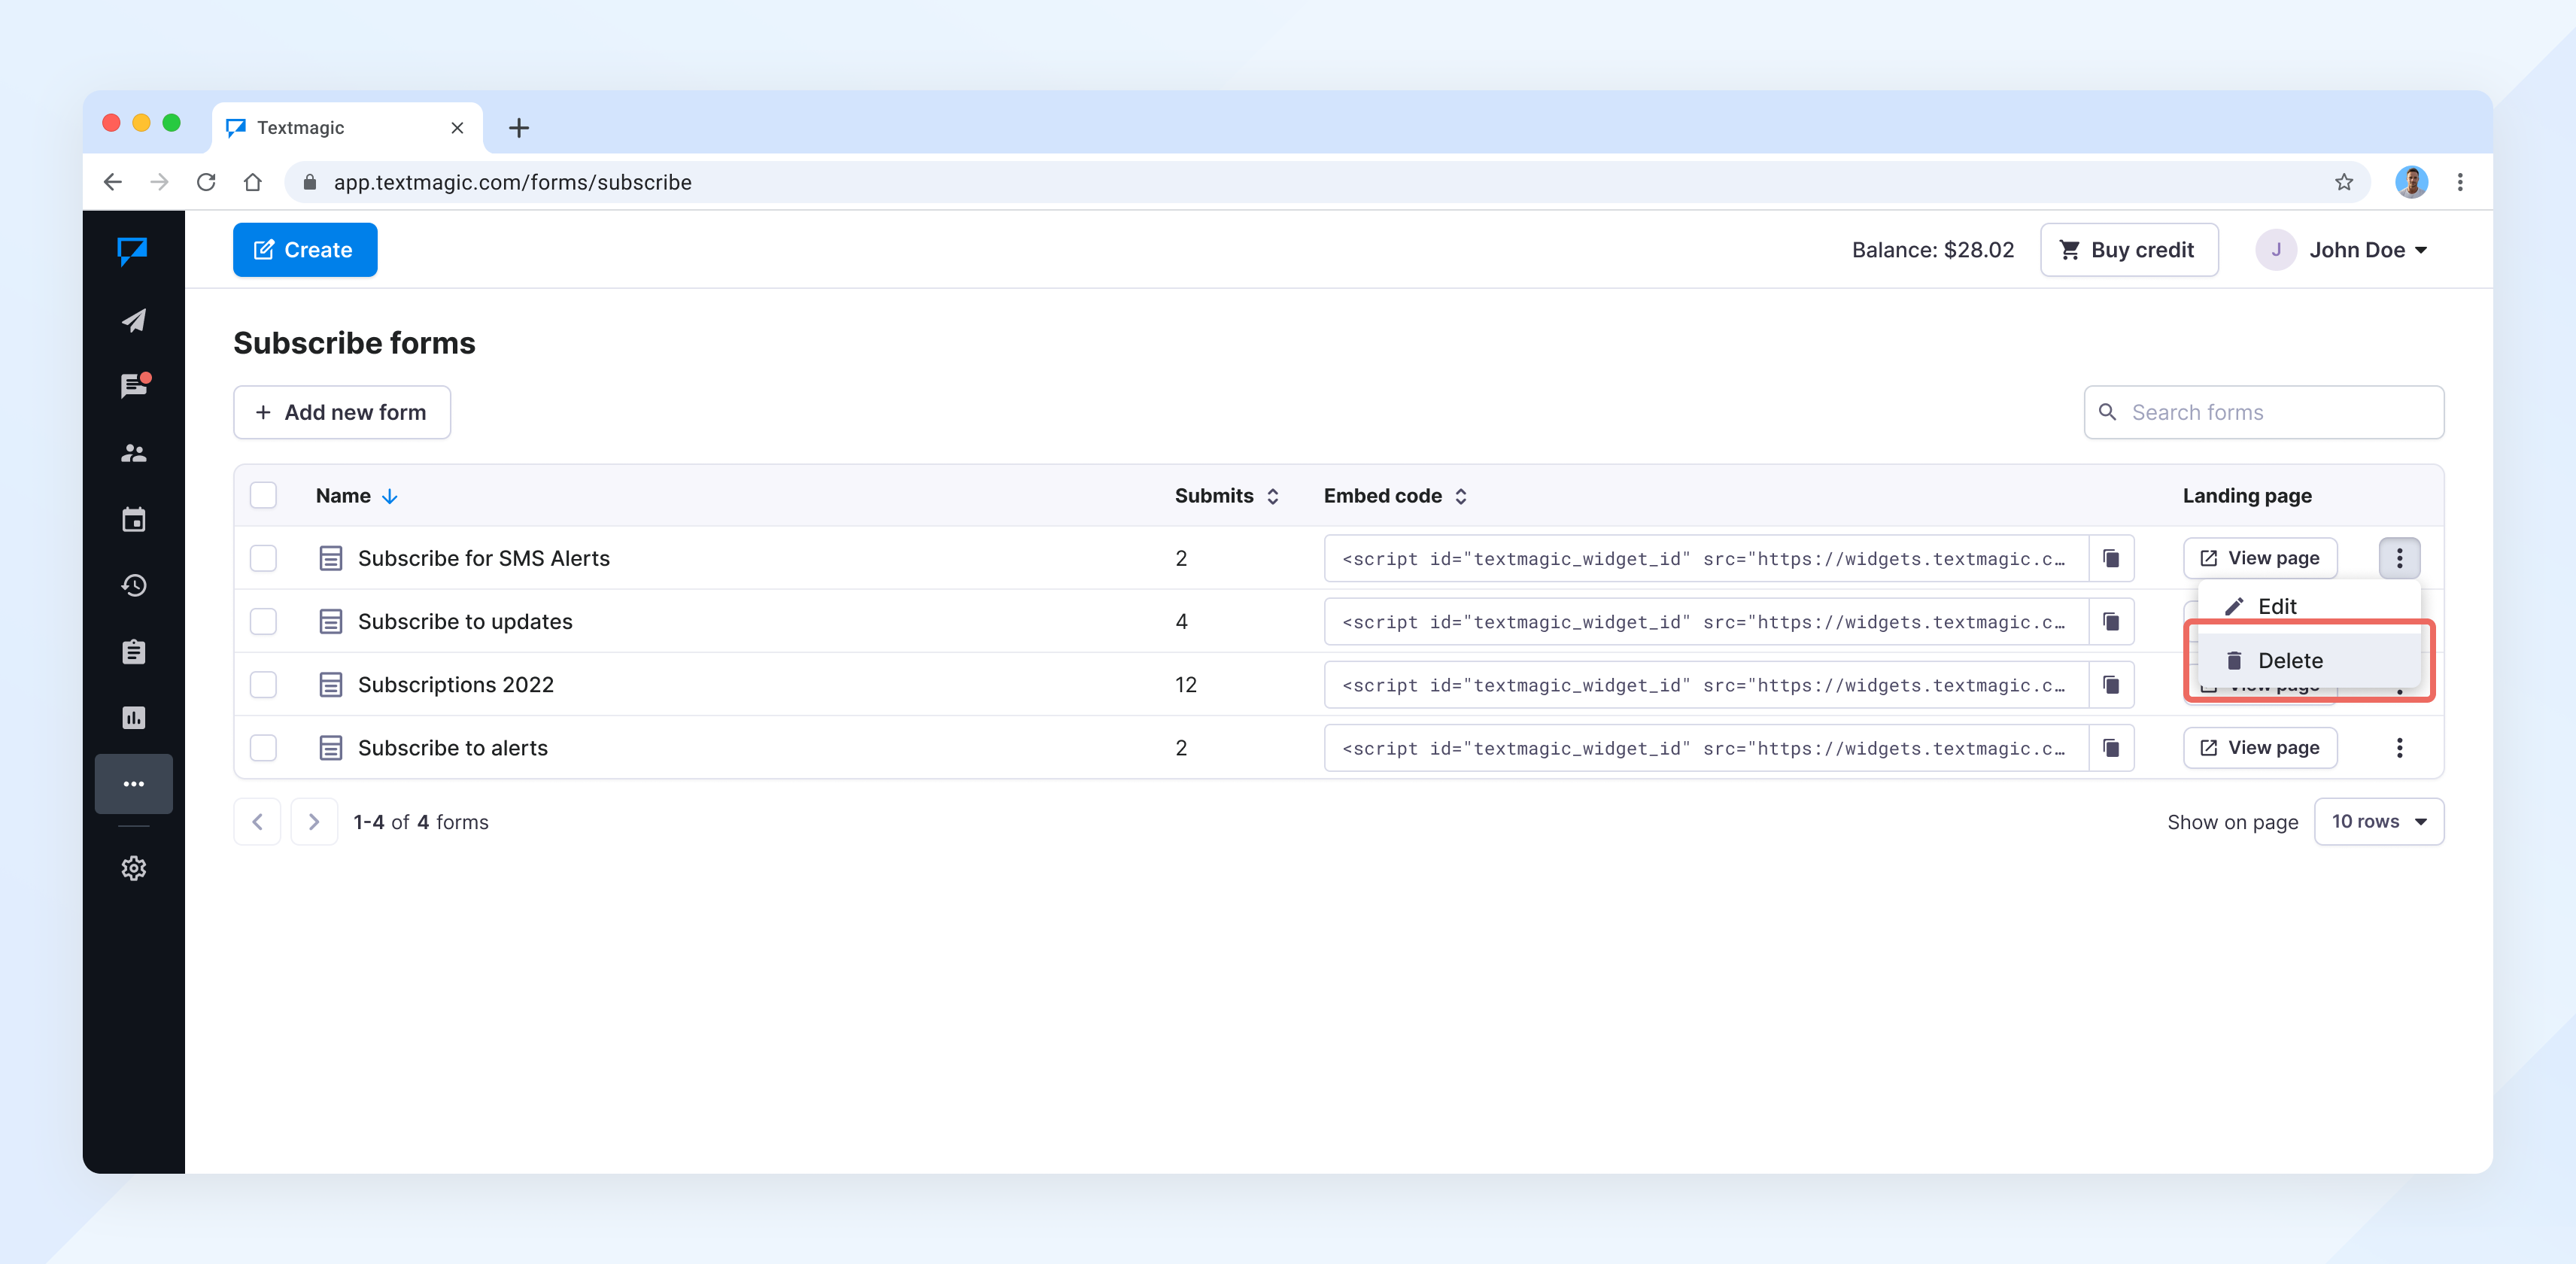
- Navigate to More -> Forms.
- Click Delete form.
Remember that your subscribers can unsubscribe from your list by replying STOP to any text message you send.