Set up automated text messaging with noCRM.io
Let’s say you make an appointment with a lead and would like to have an easy confirmation and cancelation process to manage such lead appointments. By connecting Textmagic and noCRM.io, you will be able to send out automated text messages once appointments are made.
All you need to set this up are Textmagic, noCRM.io, and Zapier accounts.
What is noCRM.io?
noCRM.io is a lead management software built to help sales peoples keep track and close deals without spending hours filling out forms. NoCRM.io makes it easy to acquire new customers and simplifies the sale process to convert leads into deals.
If you don’t have an account with noCRM.io, click here for a free trial.
Set up a trigger app in Zapier:
Sign in to your Zapier account. If you don’t have one, you can sign up for a free account.
- Click on the Make a Zap button.
- Choose a Trigger App: noCRM.io

- Choose a Trigger: Manual Trigger
- Connect Zapier to your no CRM.io account if you haven’t already:
- Enter your slug/account name (https://ACCOUNT.nocrm.io)
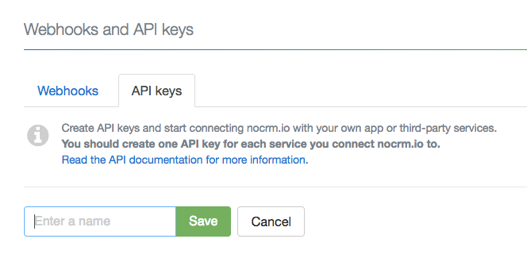
- Enter your API Key (Go to your no CRM.io account > Admin > Webhooks and API > API Keys then click on the Create an API key button and name it.)
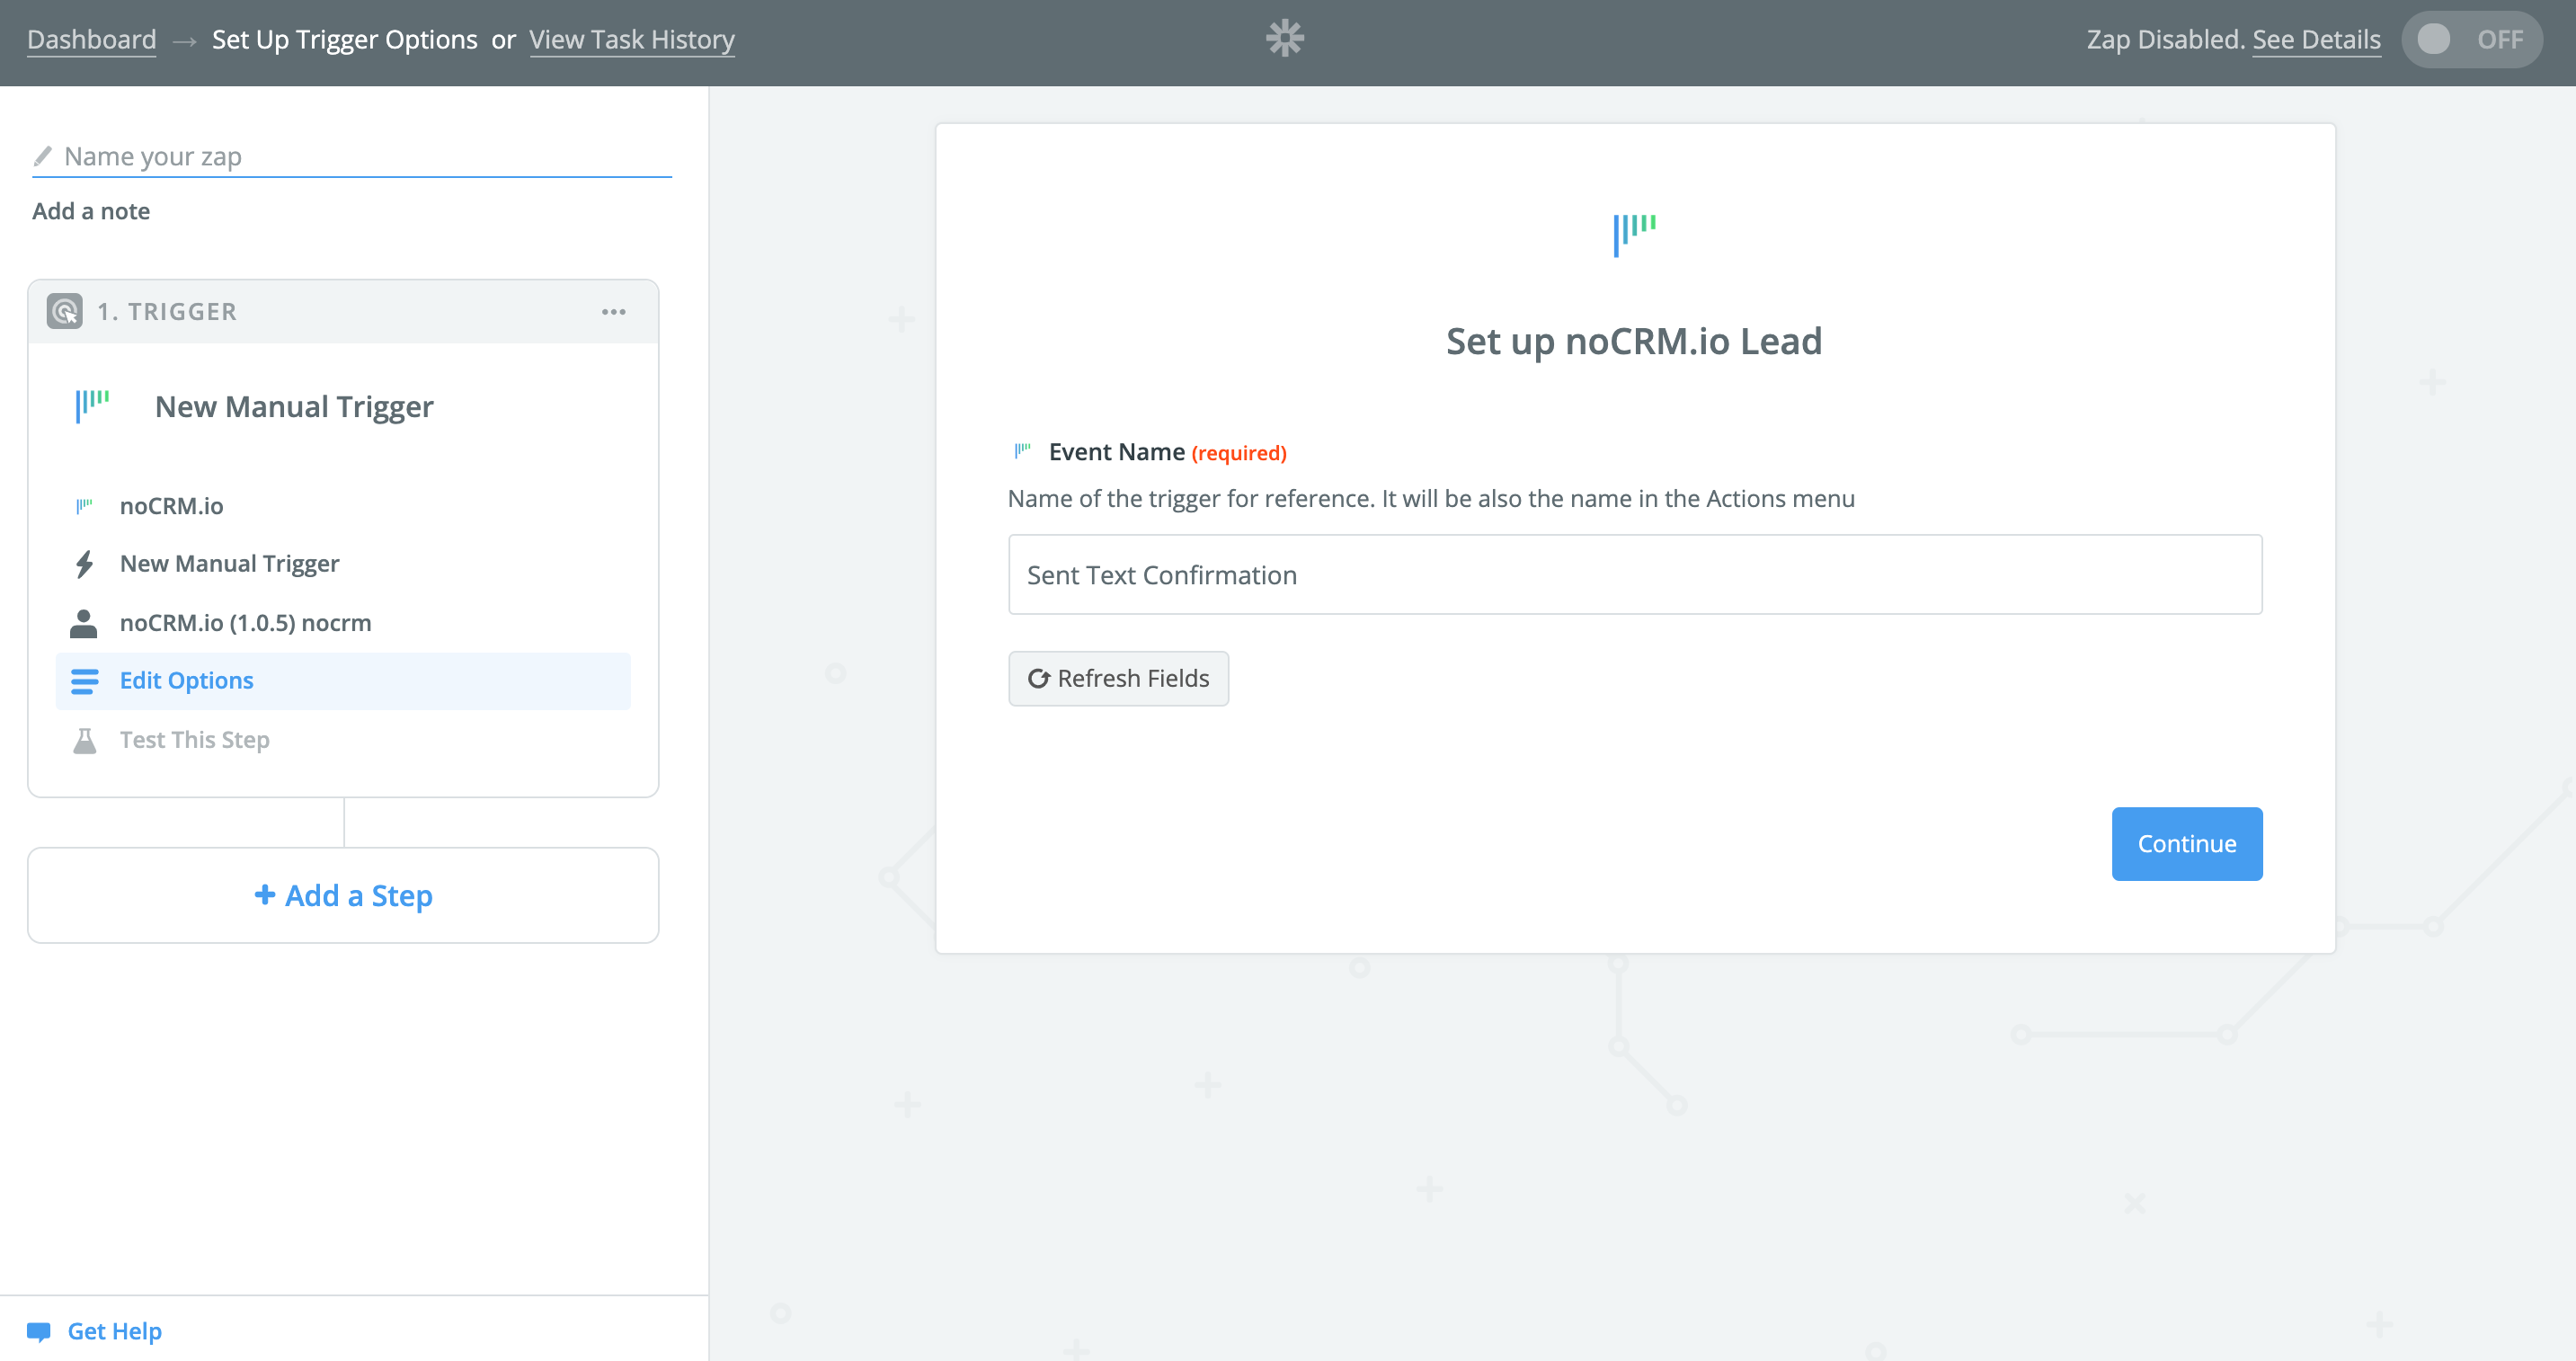
- Name your Event – this will be the name of the trigger in the Actions menu.
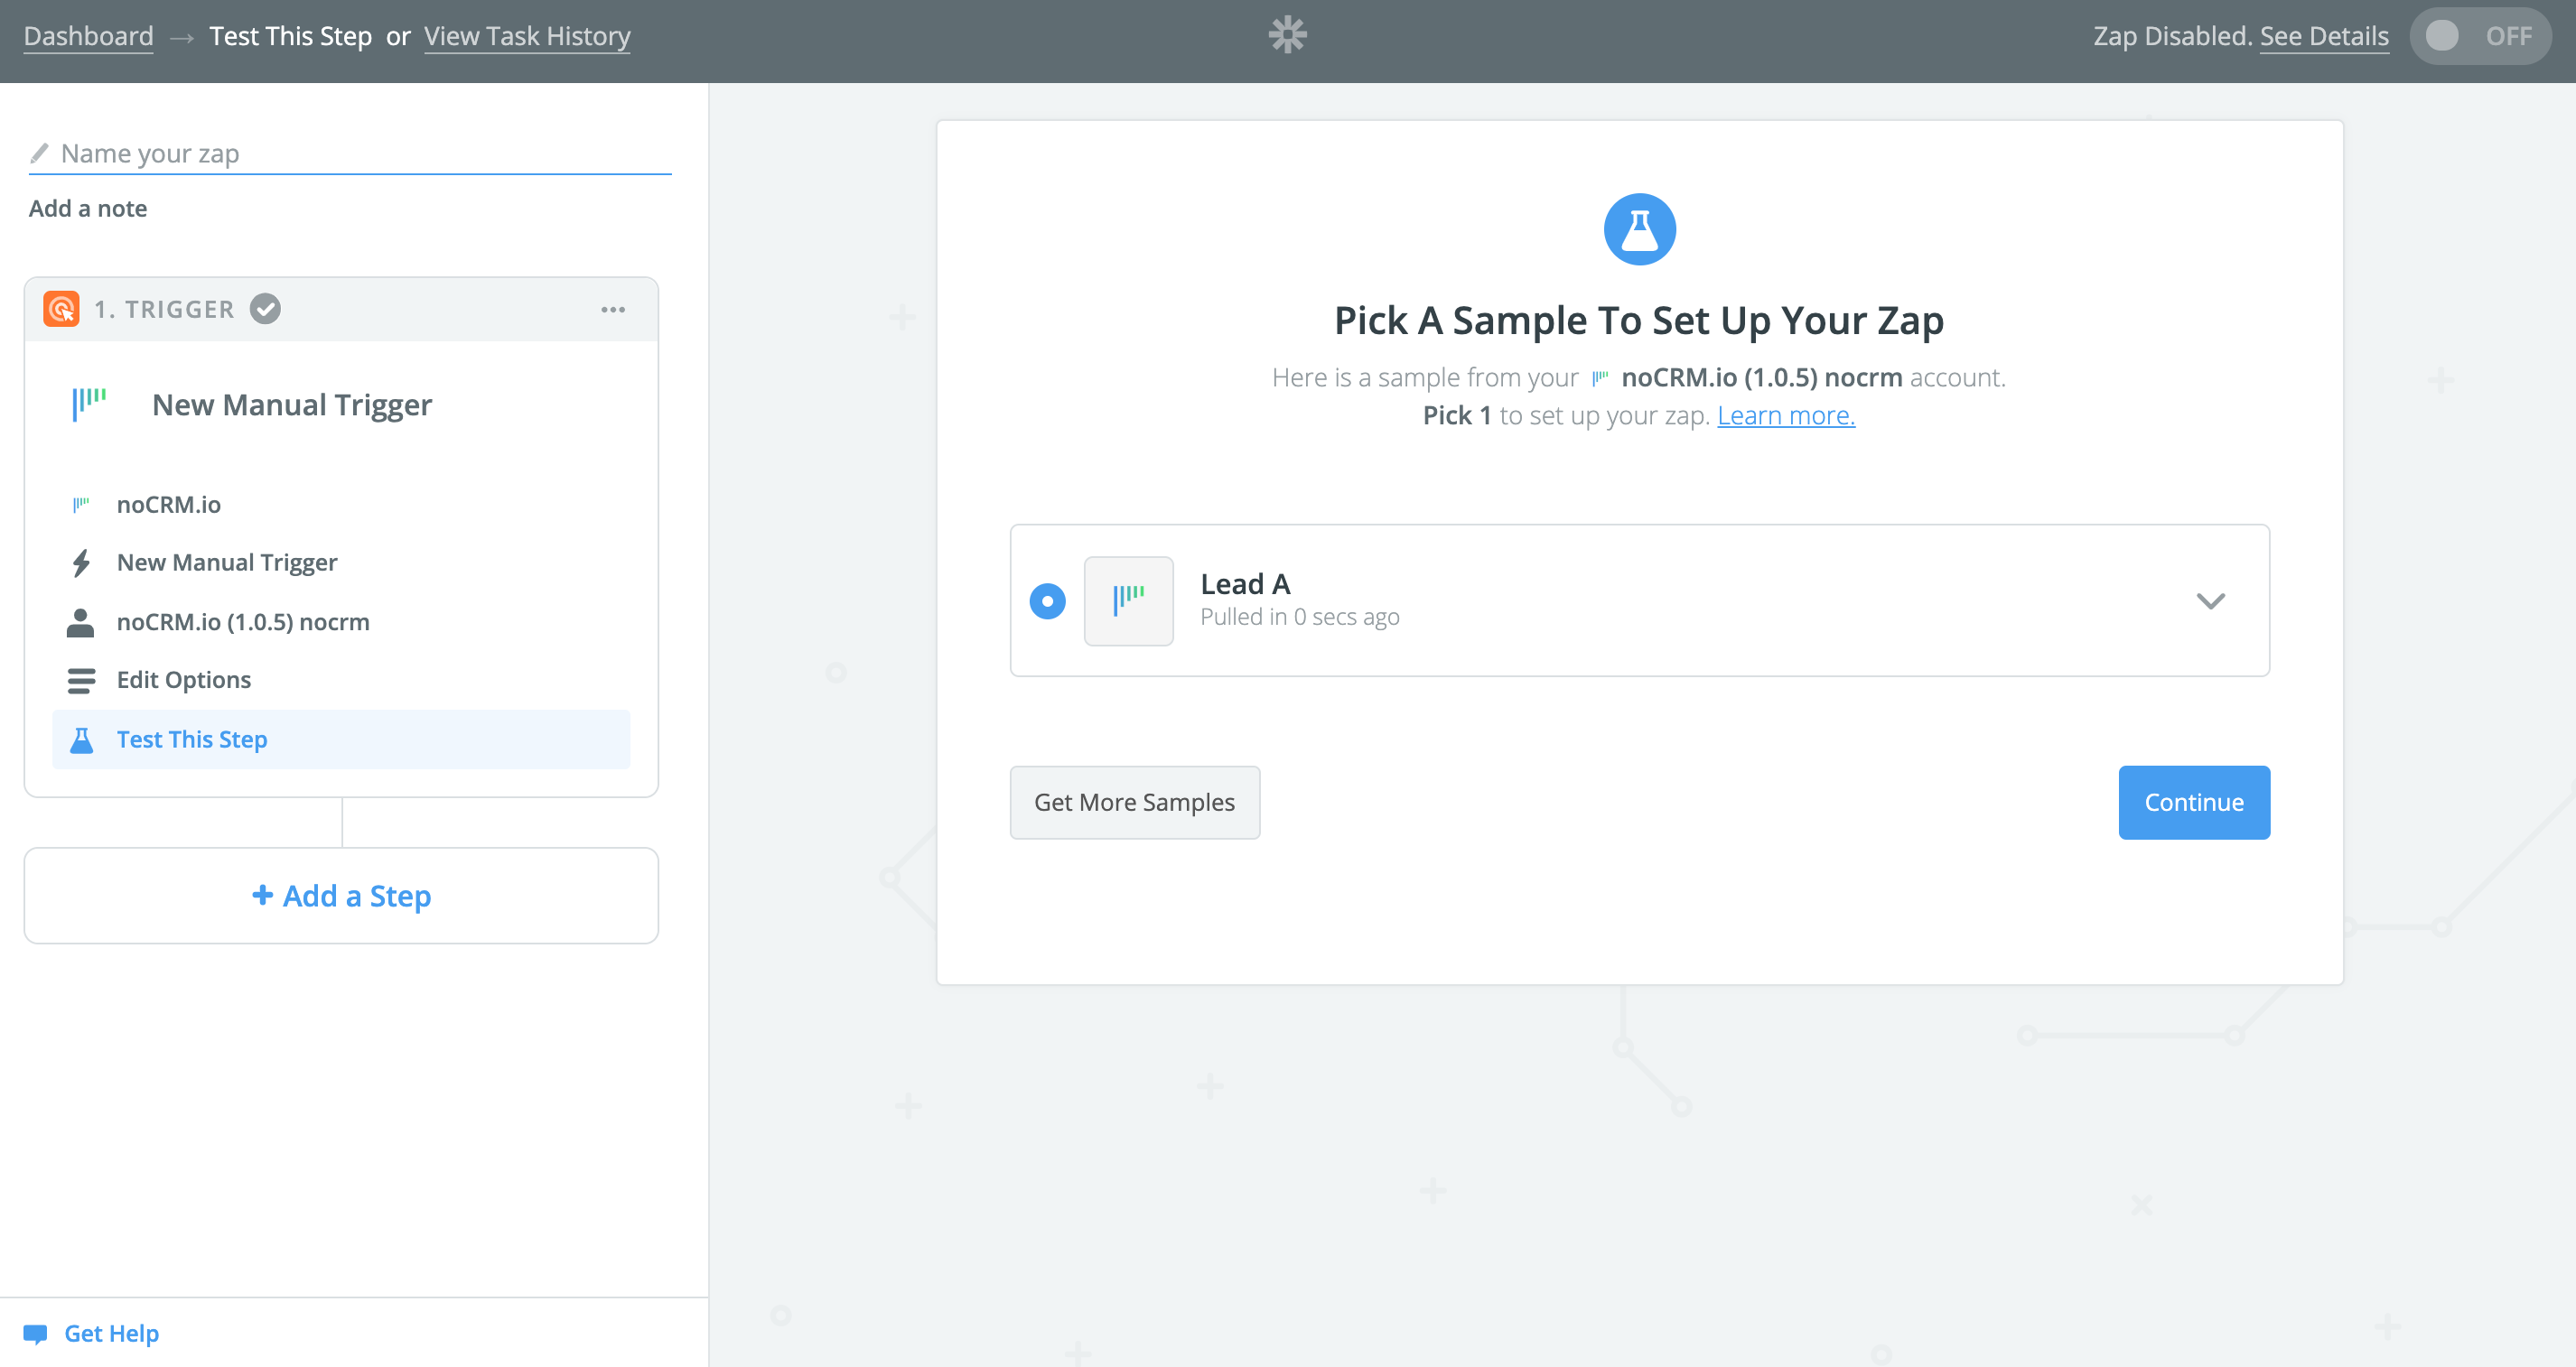
- Click Continue and you will be prompted to pick a sample lead to test the zap.
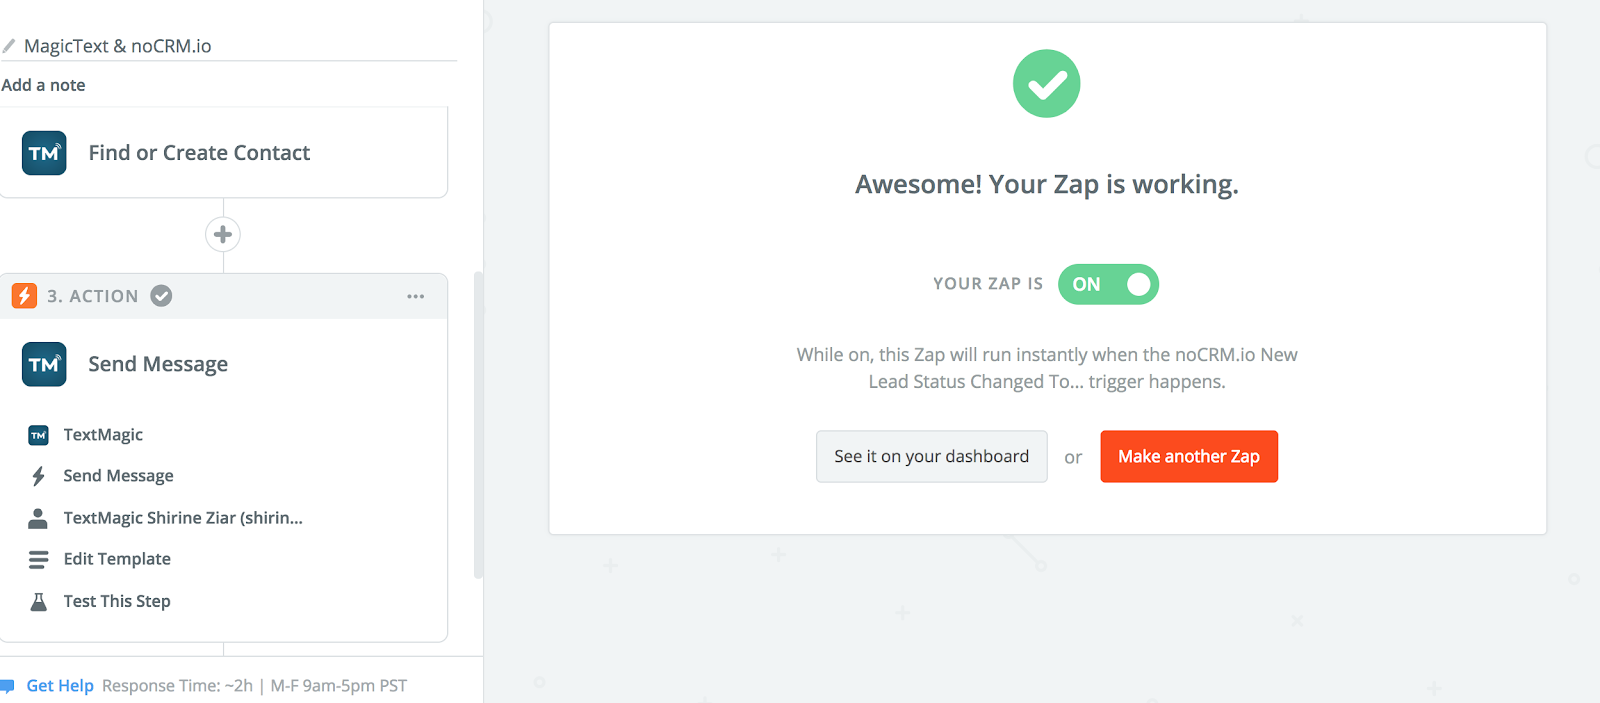
Set up an action app in Zapier:
The next step is to add an action to the trigger that was just created.
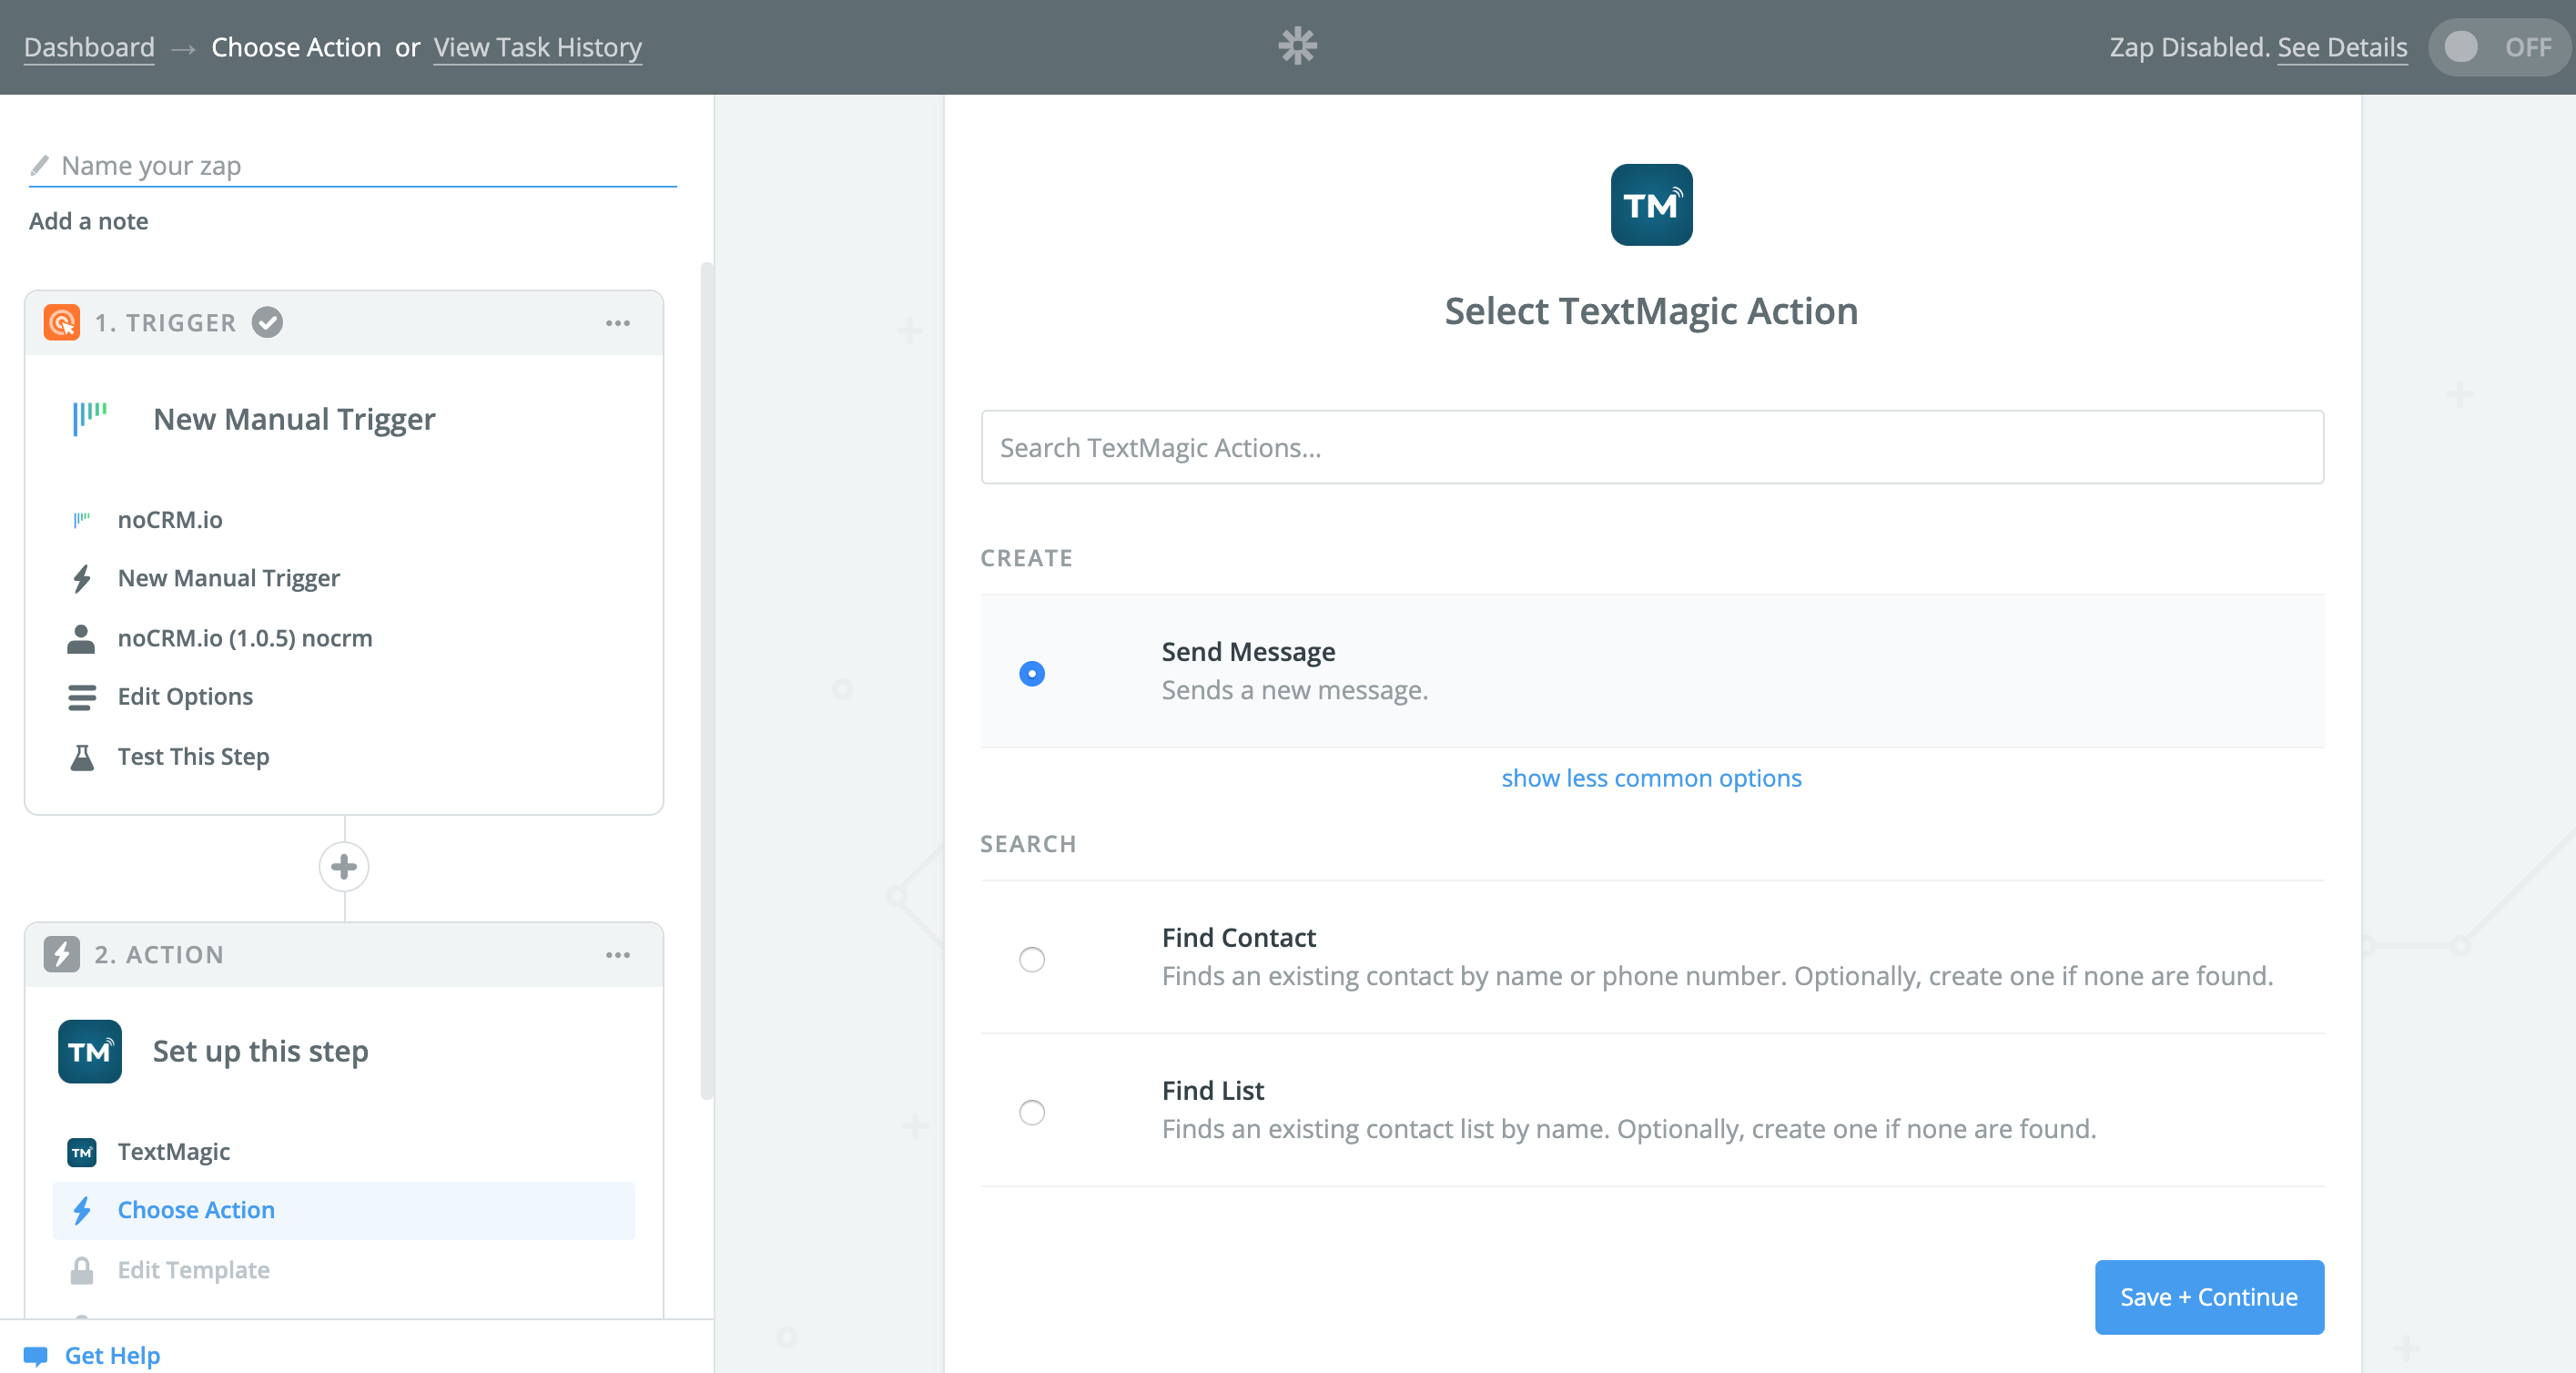
- Select Textmagic as the application to carry out the action and select the Send Message action.
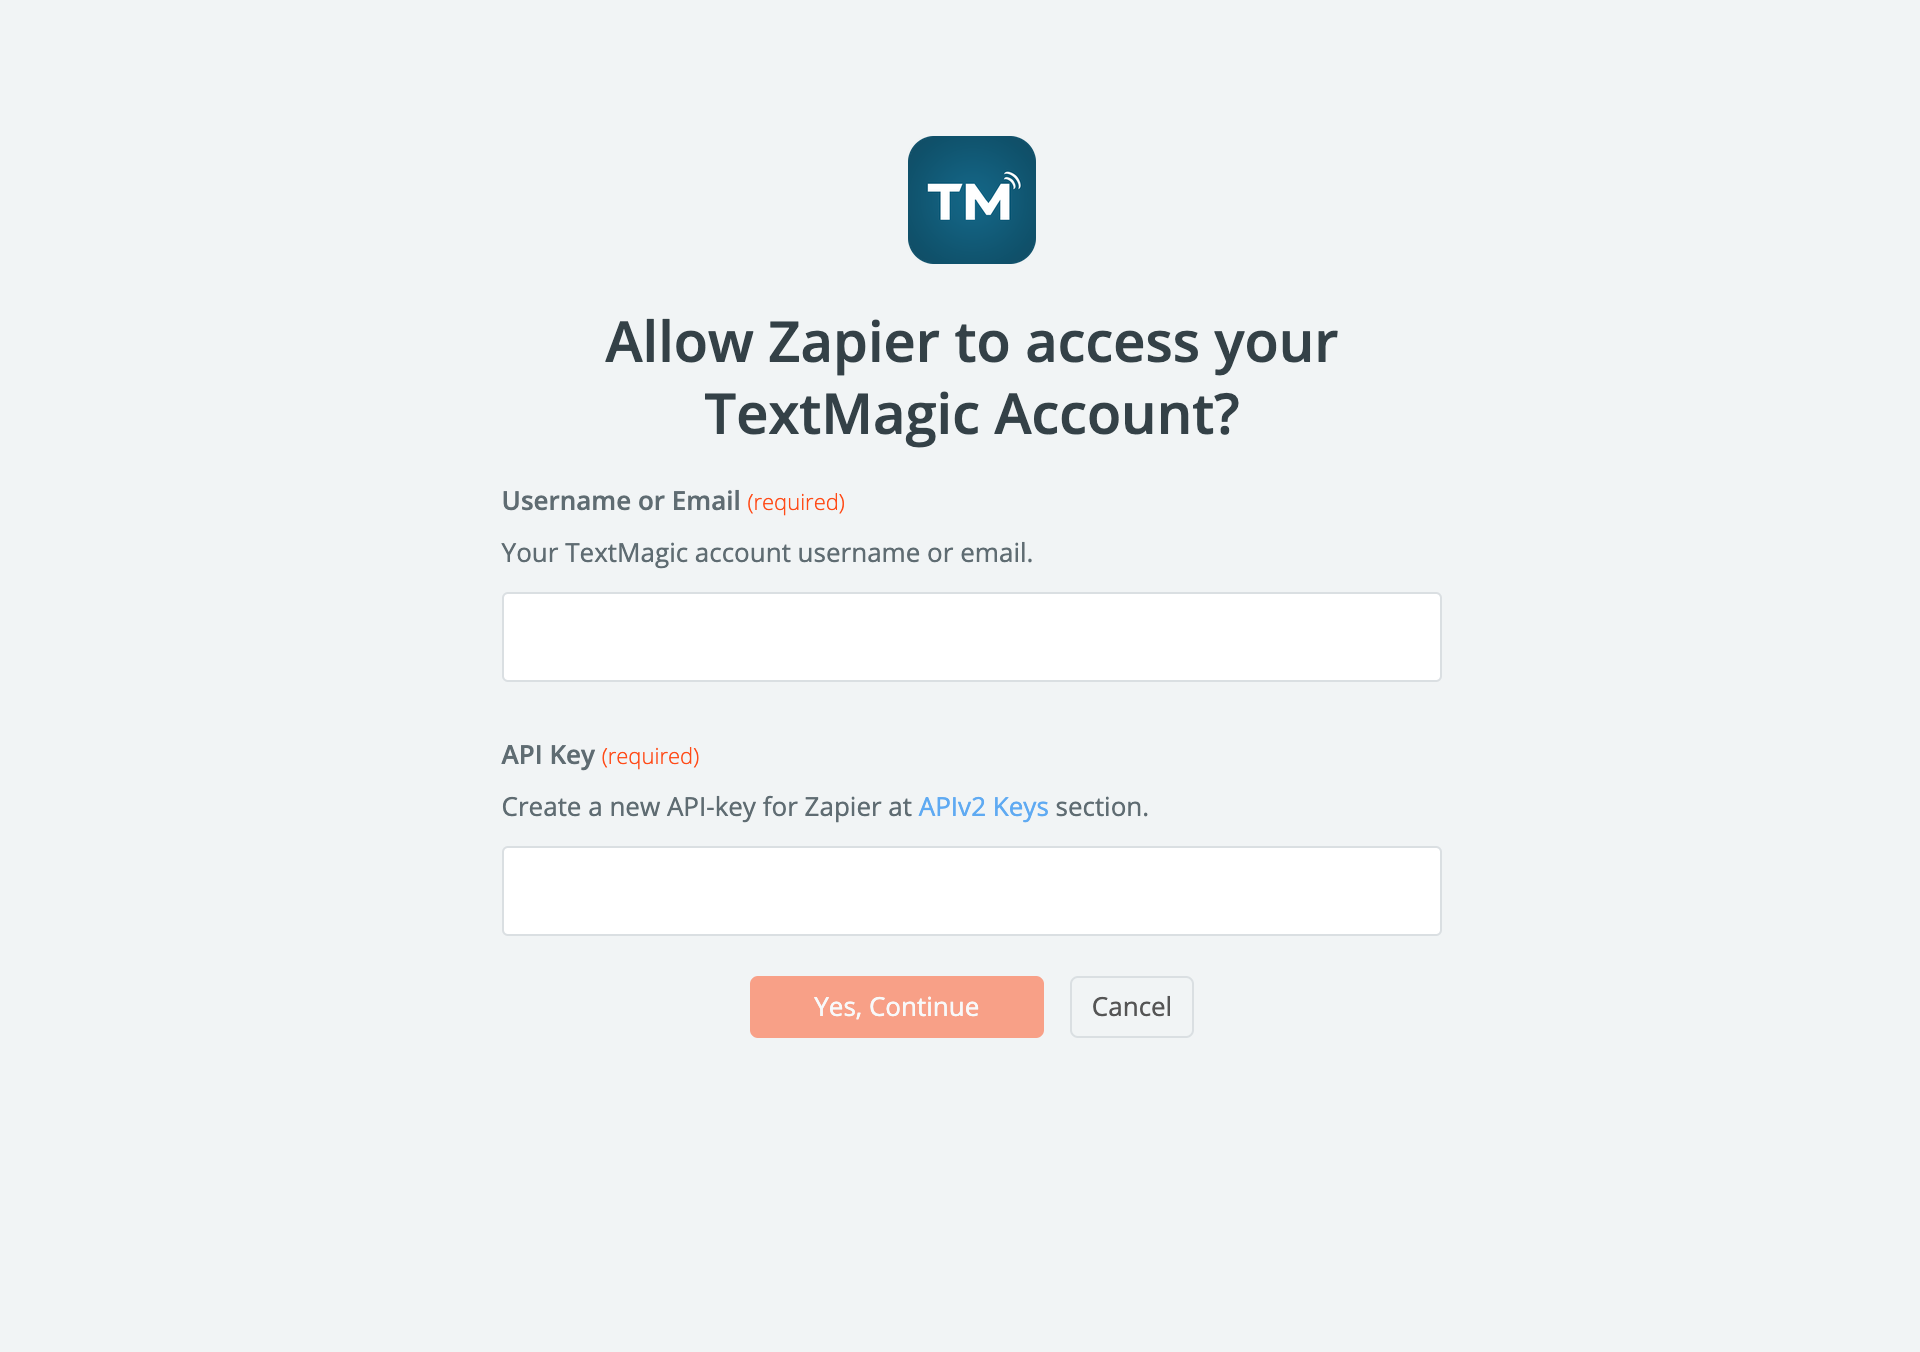
- Connect your Textmagic account with your username and APIv2 Key.
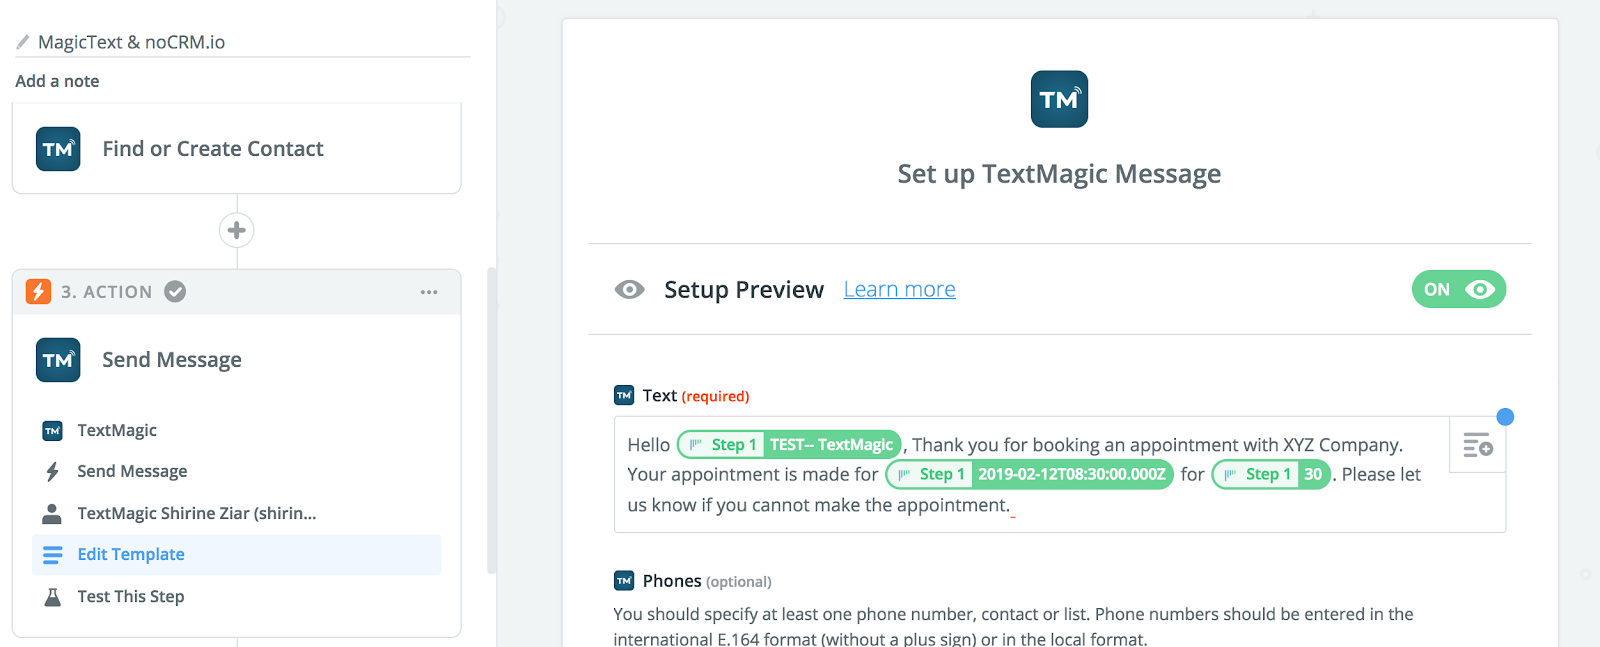
- Once your Textmagic account is connected, it is time to create the message template. This is where you can create a message using dynamic tags that will be populated with the lead information.
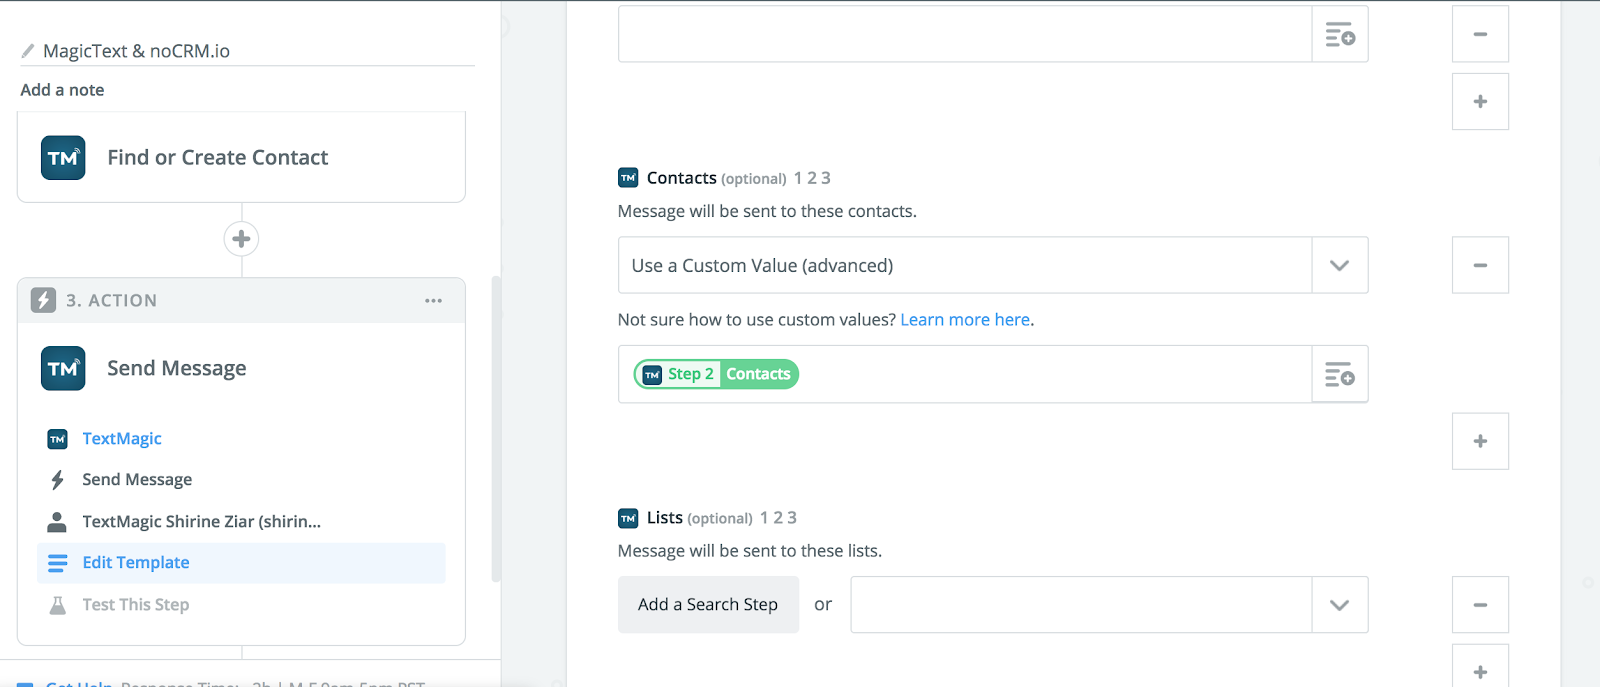
- Once your message template is created, you will need to set up an extra step to generate a new contact in Textmagic every time a trigger is made. This step will be mandatory once you start setting up the contact information for the message.
- Now that you’re done, you just need to turn on your Zap and your action is now set up!