Textmagic help center

Get the help you need with our comprehensive business texting support center

Get started with the Customer Service Helpdesk

vurl:

The Helpdesk module centralizes customer service emails, converting them into trackable tickets. It allows your team to manage, prioritize, and resolve inquiries efficiently — all in one platform.

Using a beta version of the Helpdesk module is completely free.

Creating a new or connecting your existing inbox

To get started with the Helpdesk module, you must first create your workspace. After that, you can create new or connect your existing inboxes.

Step 1: Create your workspace

  1. Go to the Helpdesk -> Click Get started
  2. Enter a name for your workspace -> Click Create workspace to finish.

You can now use this workspace email address to simulate a new ticket or send a new inbound email from your existing mailbox to it. A new ticket will appear under the Unsolved tickets view. 

Step 2: Connect a new inbox

Once your workspace is ready, you can create a new inbox or connect your existing one.

Option A: Use the default Textmagic inbox

Textmagic provides you with a ready-to-use inbox (e.g., [email protected]) that you can start using immediately.

  • This inbox is already configured to send/receive emails and turn them into tickets.
  • To test your setup, click the Simulate new ticket button.
  • Share this email address with your customers or add it to your website’s contact page to start receiving tickets.

Tip: If you decide to use a default Textmagic email address, your email recipients will see Textmagic workspace email as a sender. 

Option B: Connect your existing email inbox

If you already have a dedicated support email, you can connect it to our Helpdesk.

  1. On the Helpdesk page, click Connect a new inbox.
  2. Enter your inbox email address.
  3. Add the email address that Textmagic generated as a forwarding email in your email app.
  4. Wait for a verification email and complete the forwarding setup.
  5. Configure additional settings such as Sender name and Default assignee.

Note: To learn more about Gmail email forwarding, please check the Gmail help center

Once email forwarding is enabled, all your incoming emails will automatically convert to tickets and appear in a shared inbox under the Unsolved tickets view.

Helpdesk settings

The Helpdesk settings section allows you to configure how your ticketing system operates. Below is the list of the settings you can manage.

Connected inboxes

The connected inboxes section is where you manage all the email accounts linked to your workspace.

Active inboxes: This section shows the number of active inboxes in your workspace. Clicking an inbox opens a detailed view that allows you to edit existing inbox configurations or delete the inbox. 

Note: If you delete the inbox, all tickets associated with this inbox will be marked as Closed. This action cannot be undone.

Connect new inbox: Clicking the Connect new inbox opens a flow described in Step 2: Set up an email inbox. You can integrate multiple email addresses to handle all customer queries from one place.

Spam filter

The spam filter helps you keep your inbox clean by filtering out unwanted emails.

Note: Textmagic may also block suspicious inbound and outbound emails.

Blacklist: Add specific email addresses, domains, or phrases that should be flagged as spam. Any email matching these criteria will be moved to the spam folder automatically.

Whitelist: Add trusted email addresses or domains to ensure their emails always land in your inbox, regardless of content.

General

The general settings section allows you to customize:

  • Start ticket ID count from: You can define the starting number for ticket IDs. This is useful if you want your helpdesk system to align with existing processes or maintain continuity.
  • Mark tickets as closed: Set a time frame (e.g., 7 days) for tickets to automatically move to a closed state after being resolved. Closed tickets cannot be reopened. Instead, a follow-up ticket will be created.

Filtered views

The filtered view settings section allows you to customize the sidebar:

  • Manage default views
  • Add new views
  • Duplicate existing views
  • Customers with sub-accounts (legacy): The helpdesk section is unique for each sub-account. This account setup does not support creating or using shared inbox views across multiple sub-accounts.
  • Customers with users: All users within the same account branch have identical permissions and can perform the same actions in the shared views and helpdesk tickets. When multiple users are viewing a ticket, an alert will appear.

Below is a brief overview of the supported features.

Sidebar navigation

In the sidebar, you’ll find a list of predefined views to help categorize and track tickets.

  • Unsolved tickets: All tickets, excluding tickets with status solved and closed.
  • Critical: Tickets marked as high priority.
  • Open: Tickets that you received a reply for or those that you submitted as open. 
  • Pending: Tickets that you marked as pending.
  • Solved: Tickets that have been marked as solved.
  • Closed: Tickets that were solved more than 7 days ago.
  • Drafts: Unsent replies or tickets.
  • Unread: All tickets that were left unread or were marked as unread.
  • All tickets: All tickets with all statuses. 
  • Spam: Emails flagged as spam, with the conditions that you selected. 

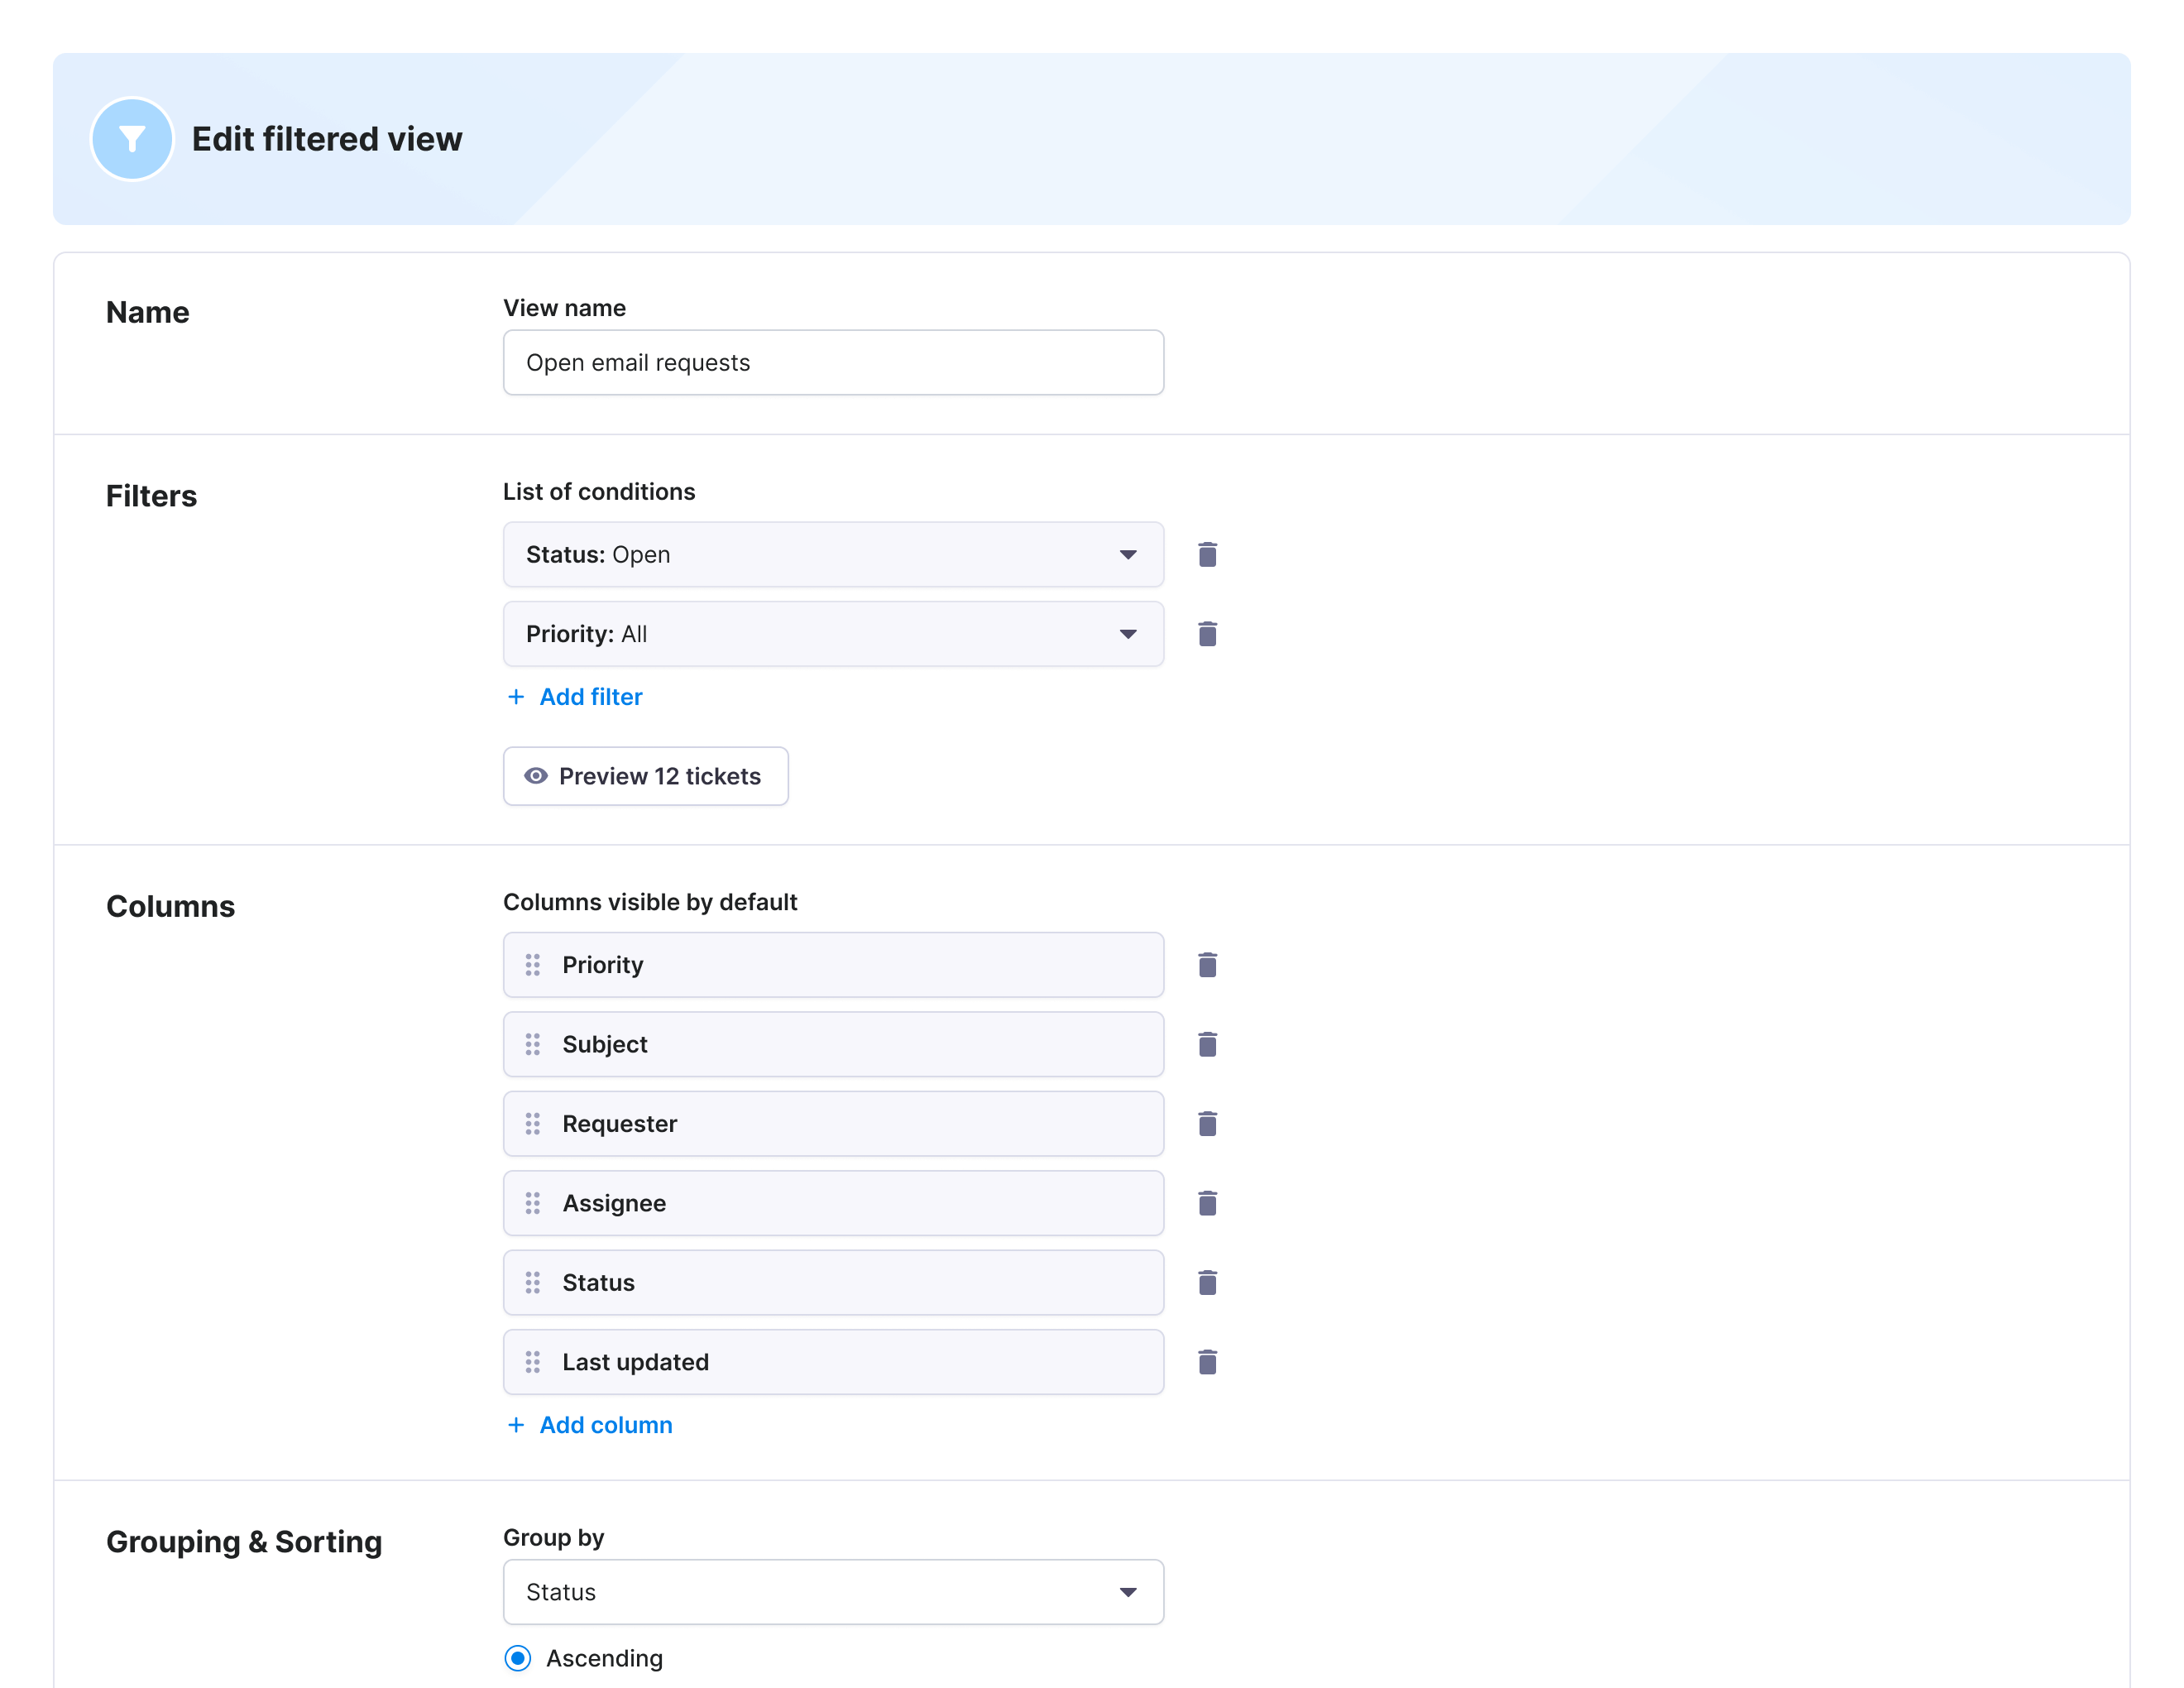
You can adjust your helpdesk ticket views to work the way you need:

  • Drag and drop views to arrange them in the order that makes sense for you.
  • Edit the view to update its settings.
    • Rename the view to keep things clear and organized.
    • List conditions to see or change the criteria for the tickets shown.
    • Set sharing preferences to control who can access the view.
  • Delete views you don’t need (except “All Tickets,” “Spam,” and “Unread”). Don’t worry — deleting a view won’t delete any tickets.

Ticket view management

When opening any view, by default, the following columns will be displayed:

  • Subject
  • Priority
  • Requester
  • Status 
  • Last updated

Use the Columns button to toggle visible fields in the view, such as: ID, Subject, Priority, Tags, Requester, Due Date, etc.

Use the Filters option to refine the ticket list by:

  • Status (e.g., Open, Pending, Solved).
  • Priority (e.g., Normal, Critical).
  • Inbox (e.g., all inboxes or selected).
  • Date created or other fields.
  • Subject.
  • Requester and more.

After applying the filter, you can save it as a new view for future use.

Ticket detail view: actions and features

The ticket detail view allows you to reply to tickets, create tasks, manage contact information, and add contact notes.

Respond to the sender:
  • Use the public reply field to address the query or provide information.
  • Attach files, insert images, or use emojis for clarity and tone.
  • Insert templates and images.
  • Update ticket status:
    • Change the status (e.g., new, pending, solved) using the buttons at the top or dropdown options.
    • Mark the ticket as “solved” once the issue is addressed.
  • Add internal notes: Document private comments or next steps visible only to your team.
Details panel (right side):
  • Ticket information shows useful data that relates to the ticket. 
  • Contact information allows you to access sender details from the same page and add notes to maintain customer-specific insights.

Using these features, you can efficiently manage customer service tickets, ensure effective communication, and track ticket progress.


Was this post helpful?

Try our fully featured business
texting platform today

Grow revenue and improve engagement rates by sending personalized, action-driven texts to your customers, staff, and suppliers.