
Connect Textmagic to your AI assistant: MCP guide
Who this is for: anyone who wants to use Textmagic (send and track SMS, manage contacts) directly from an AI assistant like Claude or ChatGPT, or from a coding tool like VS Code, Cursor or Windsurf.
What you’ll need: a Textmagic account and 2 minutes. No API keys, no tokens to copy. You sign in through your browser.
Note: in Claude, Textmagic is now an official connector in the connector directory, and in ChatGPT it’s an official plugin — one click to connect, no manual setup. For coding tools (VS Code, Cursor, Windsurf and others) you still add it manually with the address below.
Contents
- What is this?
- What you can do
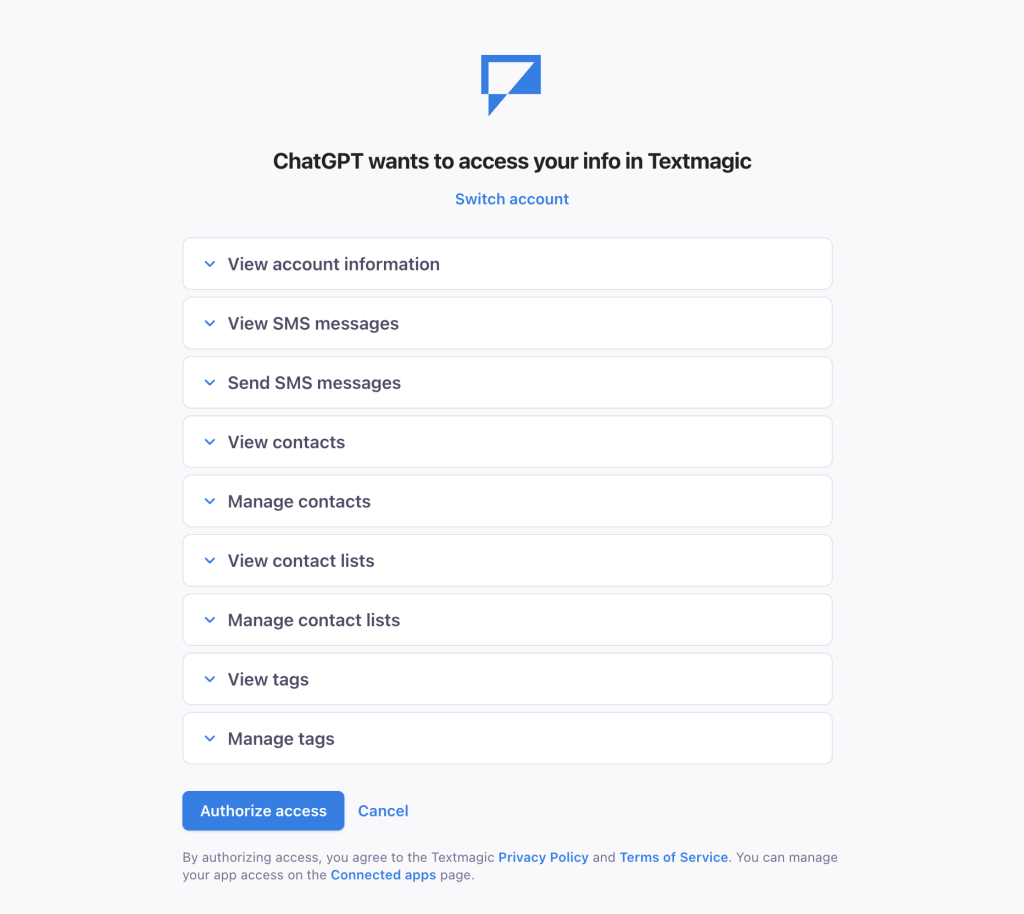
- Permissions (what you’re granting)
- How signing in works
- Setup by tool
- Claude – Web
- Claude – Desktop
- Claude Code (CLI)
- ChatGPT
- Gemini – Web and mobile app
- Antigravity CLI (agy)
- VS Code (GitHub Copilot)
- Cursor
- Windsurf
- Cline
- Other tools
- Managing and disconnecting
- Good to know / troubleshooting
What is this?
Textmagic now speaks a shared standard called MCP (Model Context Protocol). Think of it as a universal plug that lets an AI assistant securely work with your Textmagic account. Once connected, you can ask the assistant in plain language to send a text, check replies, or tidy up your contacts, and it does it in your Textmagic account.
Your Textmagic MCP address (needed for coding tools only): https://mcp.textmagic.com
What you can do
Once connected, you can ask your assistant to:
📤 Send and schedule SMS
- Send a text to one person, a group, or a whole contact list.
- Preview first: the assistant always shows you the recipients, the message, and the exact cost before anything is sent. You confirm, then it sends.
- Schedule messages for later, or set up recurring sends (e.g. every Monday).
📥 Track delivery and read replies
- Check whether messages were delivered.
- Read incoming replies from your customers.
- Review past send sessions and their cost.
👥 Manage contacts, lists and tags
- Search, view, create and update contacts.
- Organize contacts into lists and tag them.
💳 Account
- Check your balance, currency, timezone and local time.
Real-life examples (just type these)
- “How many SMS credits do I have left?”
- “Text John Smith: ‘Your appointment is tomorrow at 3 PM.'”
- “Send a reminder to everyone in my ‘Clients’ list about our sale this weekend.”
- “Show me the replies I got today and summarize them.”
- “Did my last batch of messages get delivered?”
- “Every Monday at 9 AM, text my ‘VIP’ list this week’s offer.”
- “Add all contacts from France to the ‘EU’ list and tag them ‘newsletter’.”
- “Find the contact with phone +14155550132 and update their email.”
Permissions (what you’re granting)
When you connect, you approve exactly what the assistant may do. These are the permissions Textmagic shows on the consent screen:
| Permission | Notes | What it means |
|---|---|---|
| View account information | Access your account balance, time zone, and current local time. | |
| View SMS messages | Read sent and received SMS messages, including replies and delivery status. | |
| Send SMS messages | write · uses credit | Send SMS messages and schedule them for later delivery using your account balance. |
| View contacts | Access your contacts and their details. | |
| Manage contacts | write | Create, update, and maintain contacts in your account. |
| View contact lists | Access your contact lists and see which contacts belong to them. | |
| Manage contact lists | write | Create and edit contact lists, and add or remove contacts from them. |
| View tags | Access the tags used to organize your contacts. | |
| Manage tags | write | Create and edit tags, and assign or remove tags from contacts. |
Safe by design: only “Send SMS messages” spends money, and the assistant always previews the cost and asks you to confirm before sending. Nothing is sent without your OK. Textmagic never gives the assistant access to your login password.
How signing in works (same for every tool)
Whatever tool you use, the sign-in is the same and takes seconds:
- You add Textmagic in the tool (one click from the directory in Claude and ChatGPT; paste the address in coding tools).
- Your browser opens a Textmagic consent screen showing which assistant is asking and what it wants to do.
- You click Authorize access.
- Done. The tool is connected. You never copy or paste any token.
The consent screen shows the requesting app and its logo, a “Switch account” link (to authorize under a different Textmagic account), the full list of permissions (each expandable), and Authorize access / Cancel buttons.
Setup by tool
Jump to your tool:
| Tool | How you add it | Best for |
|---|---|---|
| Claude – Web | One click from the connector directory | Everyday chat use |
| Claude – Desktop | One click from the connector directory | Everyday chat use (Mac/Windows) |
| Claude Code (CLI) | One command | Developers in the terminal |
| ChatGPT | Install the plugin from the directory | Everyday chat use |
| Gemini – Web and mobile app | Paste the URL as a “custom app” | Everyday chat use (US, 18+) |
| Antigravity CLI (agy) | One command | Developers in the terminal |
| VS Code (Copilot) | Config file / command | Developers |
| Cursor | Config file / Settings | Developers |
| Windsurf | Config file | Developers |
| Cline | UI / config file | Developers |
| Other tools | Config file | Zed, JetBrains, Cherry Studio, Goose |
⚠️ A note on labels: assistants and coding tools update their menus often, and a button may be renamed by the time you read this. The flow itself (add Textmagic, approve in the browser) is stable. When in doubt, look for the word “Connector”, “Plugin” or “MCP”.
Claude – Web
You’ll need: a claude.ai account (works on Free, Pro, Max, Team, Enterprise).
Textmagic is an official connector in the Claude directory, so there’s nothing to paste.
Steps
- Sign in at claude.ai.
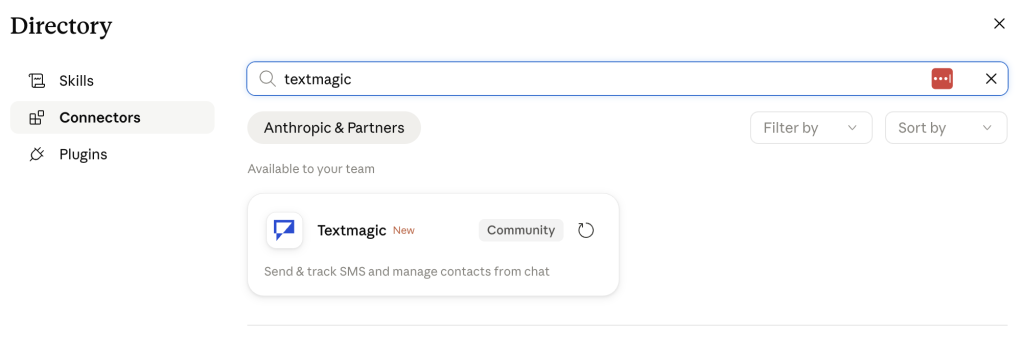
- Open the Textmagic listing directly: claude.ai/directory/connectors/textmagic.
(Or browse there: Settings → Connectors → Browse connectors and search for “Textmagic”.) - Click Connect.
- Approve on the Textmagic consent screen. The connector shows Connected.
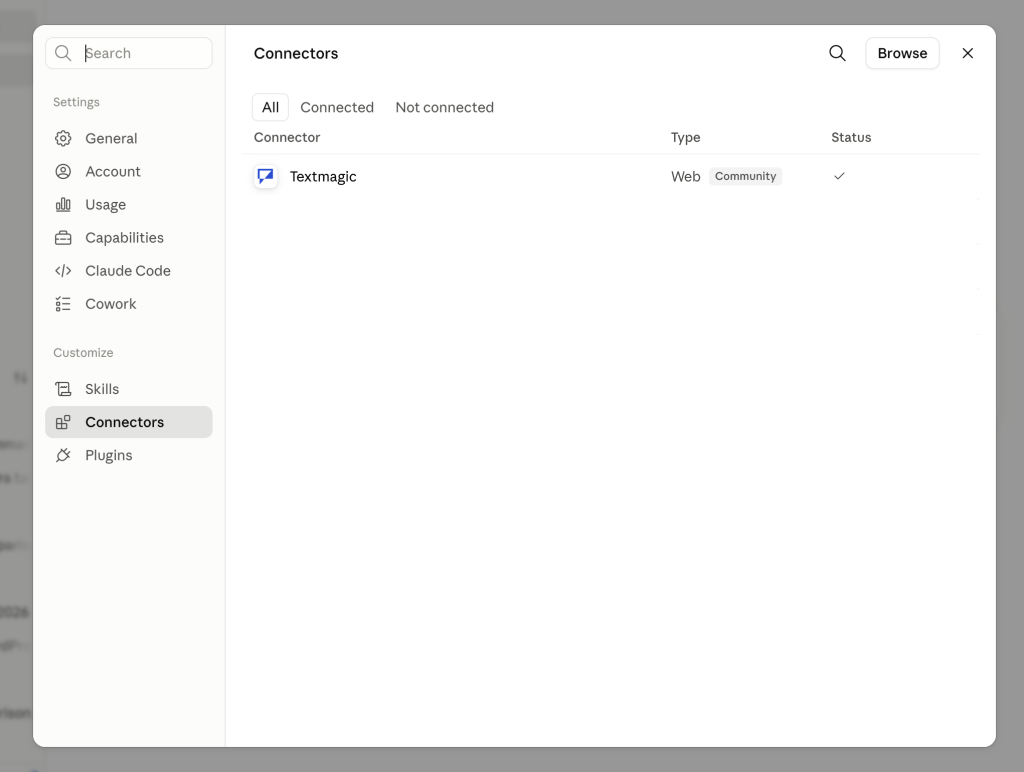
Use it in a chat: click the “+” (or type “/”) in the message box → Connectors → make sure Textmagic is on for the conversation. Then just ask.
Team/Enterprise: an Owner must first enable connectors for the organization (Organization settings → Connectors), then each member connects and signs in individually.
Prefer manual setup? You can still add Textmagic as a custom connector: Settings → Connectors → Add custom connector → paste https://mcp.textmagic.com.
Claude – Desktop
You’ll need: the Claude Desktop app (macOS or Windows) and to be signed in. It works exactly like the web. No config file needed.
Steps
- Open Claude Desktop and sign in.
- Open Settings → Connectors → Browse connectors and search for “Textmagic”.
- Click Connect.
- A browser window opens for sign-in → approve → connector shows connected.
Use the “Connectors” section, not “Developer / Edit Config” or “Extensions”. Those are for tools that run on your own computer; Textmagic is a remote service.
Claude Code (CLI)
For developers using the terminal.
Add the server:
claude mcp add --transport http textmagic https://mcp.textmagic.comSign in:
- Run
claudeto start a session, then type/mcp. - Select
textmagic→ Authenticate → your browser opens → approve → status becomes ✓ Connected.
(Or, non-interactively:claude mcp login textmagic.)
Handy commands: claude mcp list (see status) · claude mcp get textmagic · claude mcp remove textmagic.
Scope (where it’s saved): add --scope user to make it available across all your projects, or --scope project to share it with your team via a .mcp.json file in the repo. Default is this project only.
ChatGPT
You’ll need: ChatGPT on the web, signed in. Textmagic is an official plugin in the ChatGPT plugin directory, so no Developer mode and no URL to paste.
Steps
- Sign in at chatgpt.com.
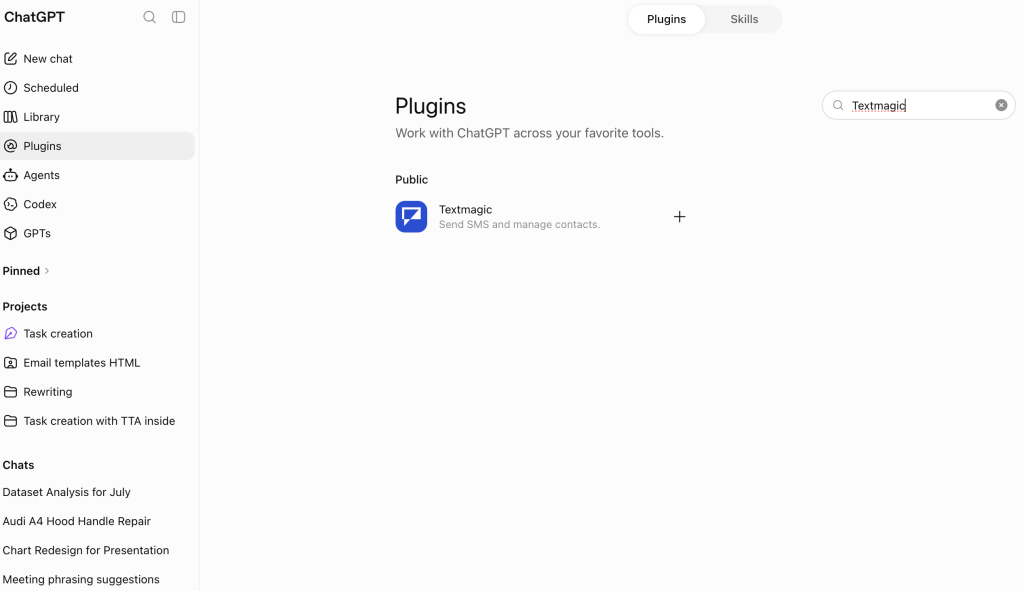
- Open the Textmagic listing directly: Textmagic on ChatGPT Plugins.
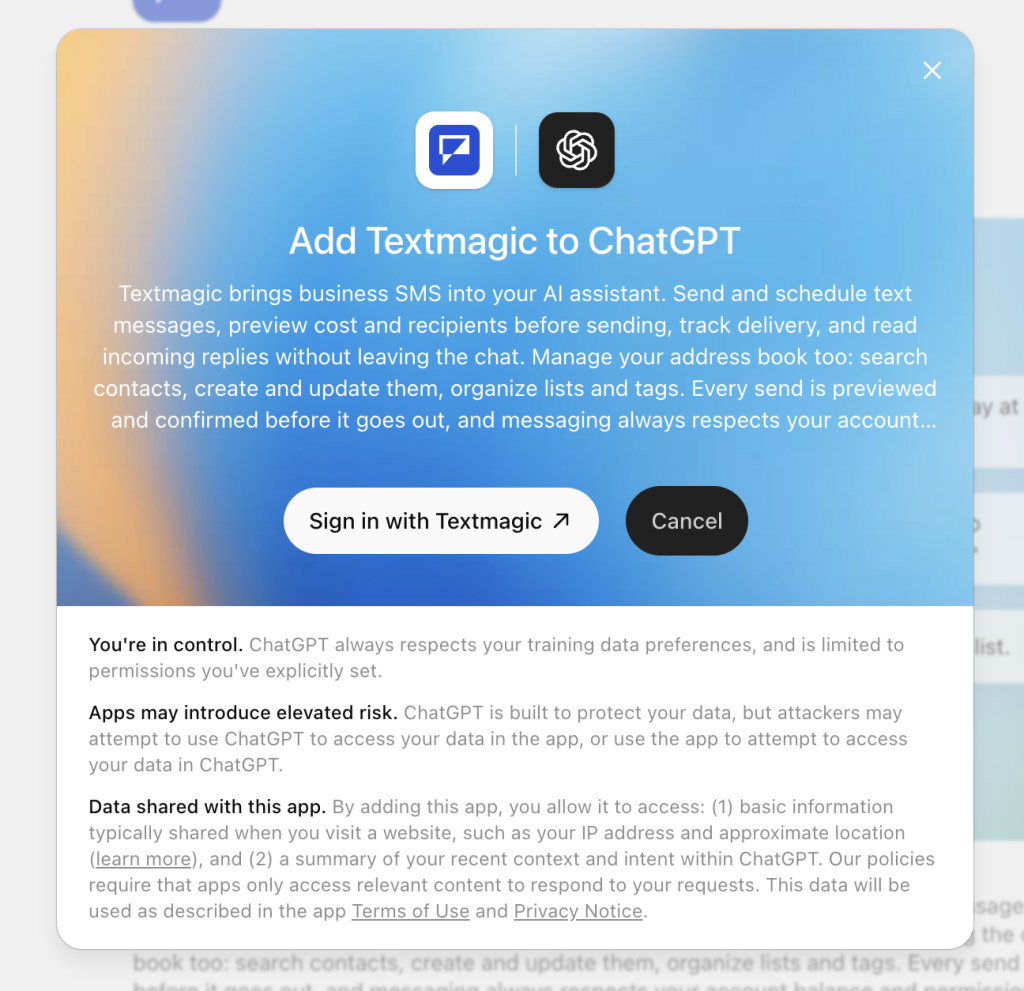
(Or browse there: Settings → Plugins → Browse plugins and search for “Textmagic”.) - Click the install/connect button on the listing.
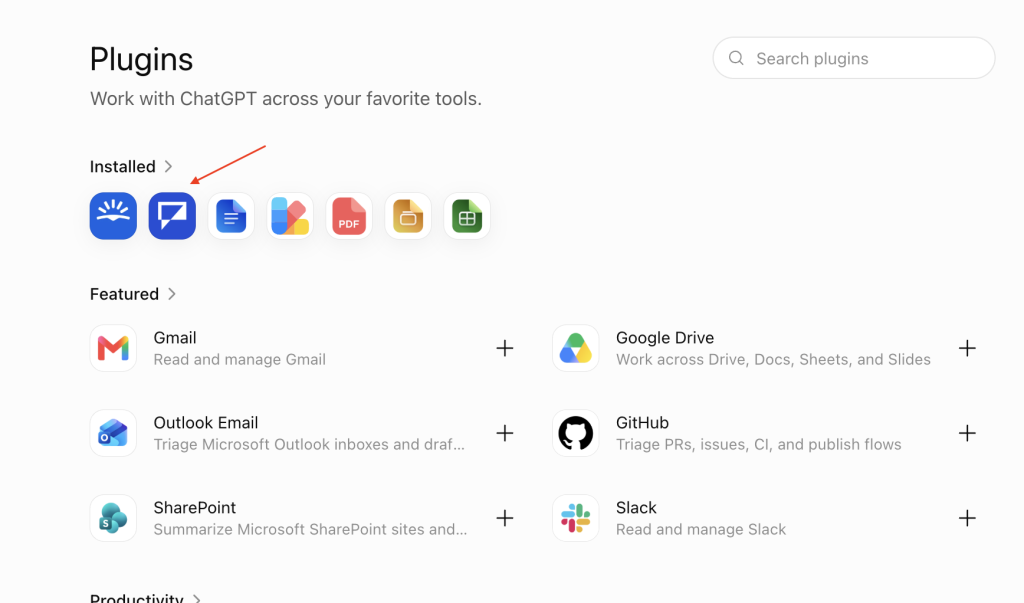
- Sign in on the Textmagic consent screen → approve → connected. Textmagic now appears under Settings → Plugins.
Use it in a chat: just ask — mention Textmagic by name the first time (e.g. “Using Textmagic, check my SMS balance”) and ChatGPT will use the plugin. Write actions (like sending an SMS) show a Confirm dialog first.
Advanced: if you prefer manual setup, Developer mode still works — turn it on under Settings → Security and login → Developer mode, then add a connector with the URL https://mcp.textmagic.com and OAuth authentication. Most people won’t need this.
Gemini – Web and mobile app
You’ll need: a personal Google account with Gemini Spark, and to be 18 or over and in the US — Google currently limits custom apps to those users, in English only. Work or school (Workspace) accounts can’t add custom apps.
Gemini calls MCP servers “custom apps”. There’s no directory listing yet, so you paste the Textmagic URL once.
Steps
- Sign in at gemini.google.com. Custom apps can only be added in the web app — once connected, Textmagic works in the mobile app too.
- At the bottom of the menu, open Settings & help → Connected Apps.
- Under Custom apps, click Add a custom app.
- Paste
https://mcp.textmagic.comand click Next. Leave Advanced features closed — Textmagic registers itself, so there’s no client ID or secret to enter. - Confirm Google’s third-party notice, then approve on the Textmagic consent screen. Textmagic now appears under Custom apps, switched on.
Use it in a chat: type @ in the message box and select Textmagic, then just ask. The @ makes sure Gemini uses Textmagic instead of answering from its own knowledge.
Keep Activity must be on. Custom apps are hidden while that setting is off.
Don’t add /mcp to the URL. Google’s help text says server URLs usually end in /mcp; Textmagic answers at the root, so https://mcp.textmagic.com/mcp won’t connect.
Antigravity CLI (agy)
You’ll need: Antigravity CLI. It replaced Gemini CLI in the terminal for free, Google AI Pro and Ultra users on 18 June 2026, so this is the terminal route for almost everyone. If you don’t have it yet: curl -fsSL https://antigravity.google/cli/install.sh | bash.
Add the server:
agy mcp add textmagic https://mcp.textmagic.comThe https:// URL is detected automatically, so there’s no --type http to add. Don’t pass --header — a manual token stops the browser sign-in from ever starting.
Sign in:
- Run
agyto start a session, then type/mcp. - Select
textmagic→ Authenticate → your browser opens → approve → the terminal says Authentication successful! and the row becomes ✓[Authed].
On the first run the row reads Unauthorized [Auth Needed]. That’s the normal starting state, not an error — it’s Textmagic telling the CLI to ask you to sign in.
Verify: /mcp shows Textmagic as [Authed] with its tools listed — 28 of them once you’ve granted every permission.
Handy commands: agy mcp list (see what’s configured) · agy mcp disable textmagic · agy mcp remove textmagic.
Where it’s saved: the server goes in ~/.gemini/config/mcp_config.json, the access token in ~/.gemini/antigravity-cli/mcp_oauth_tokens.json. The token refreshes itself, so you only sign in once.

VS Code (GitHub Copilot)
You’ll need: VS Code 1.102+, GitHub Copilot + Copilot Chat, and Copilot Agent mode (pick “Agent” in the Chat mode dropdown). MCP tools only run in Agent mode.
Add it (easiest way)
- ⇧⌘P / Ctrl+Shift+P → MCP: Add Server.
- Choose HTTP.
- URL:
https://mcp.textmagic.com· Server ID:textmagic. - Choose Workspace (this project) or Global (all projects).
Or edit the config file directly (.vscode/mcp.json for a project, or the user mcp.json):
{
  "servers": {
    "textmagic": {
      "type": "http",
      "url": "https://mcp.textmagic.com"
    }
  }
}
Sign in: on first connect VS Code asks you to trust the server, then opens a browser consent page → approve. No token needed.
Verify: run MCP: List Servers to see status, or click Configure Tools in the Chat view to see Textmagic’s tools.
Cursor
You’ll need: Cursor v1.0+.
Add via config — global file ~/.cursor/mcp.json (or project file .cursor/mcp.json):
{
  "mcpServers": {
    "textmagic": {
      "url": "https://mcp.textmagic.com"
    }
  }
}
(Or: Cursor Settings → Tools & MCP → New MCP Server, which opens this same file.)
Sign in: the Textmagic row shows “Needs authentication” with a Connect button → click it → browser opens → approve.
Verify: the row shows a green dot and an expandable tool list.
Tip: Cursor limits the assistant to ~40 tools total across all servers. If you run several MCP servers, disable the ones you’re not using.
Windsurf
You’ll need: the latest Windsurf build (OAuth support). Cascade is the assistant that uses it.
Add via config — file ~/.codeium/windsurf/mcp_config.json (Windows: %USERPROFILE%\.codeium\windsurf\mcp_config.json). Note the field is serverUrl:
{
  "mcpServers": {
    "textmagic": {
      "serverUrl": "https://mcp.textmagic.com"
    }
  }
}
(Or open it via the Cascade panel → MCP/Plugins (hammer) icon → “Open MCP Config file”.)
Then: fully restart Windsurf (or click Refresh in the MCP panel). It doesn’t reload servers otherwise. A browser window opens for consent → approve.
Verify: the MCP/Plugins panel shows textmagic with a green/active status and its tools.
Cline
You’ll need: the Cline extension (latest version) in VS Code.
Add via UI
- Open Cline → click the MCP Servers icon.
- Go to the Remote Servers tab.
- Name:
textmagic· URL:https://mcp.textmagic.com· Transport: Streamable HTTP. - Click Add Server → a browser opens for consent → approve.
Or edit the config (Configure MCP Servers button opens it):
{
  "mcpServers": {
    "textmagic": {
      "type": "streamableHttp",
      "url": "https://mcp.textmagic.com",
      "disabled": false,
      "autoApprove": []
    }
  }
}
Make sure "type": "streamableHttp" is set. Leaving it out defaults to a legacy mode and won’t connect.
Verify: the server shows a green indicator and an expandable tool list.
Other tools
All of these support the modern MCP + OAuth flow, so a bare URL is enough. Field names differ slightly:
- Zed — in
settings.json, add undercontext_servers:"textmagic": { "url": "https://mcp.textmagic.com", "headers": {} }. Leave headers empty to trigger the browser sign-in. - JetBrains AI Assistant / Junie — Settings → Tools → AI Assistant → Model Context Protocol (MCP), add a server with the
urlfield; when it says “Authorization required”, click Authorize → browser sign-in. - Cherry Studio — Settings → MCP Servers → Add, set Type =
streamableHttpand put the URL in thebaseUrlfield. - Goose —
goose configure→ Add Extension → Remote Extension (Streamable HTTP) → paste the URL.
These clients update quickly. If a field name differs, look for “remote / HTTP server URL” and leave any token/header fields blank so the browser sign-in kicks in.
Managing and disconnecting
You can see and revoke every connected assistant in Textmagic:
- Go to Settings → My account → Connected apps (
/settings/account/connected-apps). - You’ll see each connected app with when it was last used and who owns it.
- Click an app to open its details: connection info and the full list of granted permissions.
- To revoke access, click Delete connection. This disconnects the app and invalidates its access immediately.
Good to know / troubleshooting
- Sending costs credit. Only “Send SMS messages” spends your balance, and you always see the cost and confirm first. Check your balance anytime by asking “What’s my SMS balance?”
- Nothing sends by accident. The assistant previews recipients + message + cost and waits for your confirmation.
- “Switch account” on the consent screen lets you authorize under a different Textmagic account (e.g. a client’s).
- It must reach the internet. Claude and ChatGPT connect from their own cloud, so the Textmagic URL just needs to be public (it is). A tool running only on your laptop can’t be used this way.
- Tool limits in coding tools. Cursor (~40), VS Code (128) and Windsurf (100) cap how many tools the assistant can use at once across all servers. If Textmagic’s tools don’t all appear, disable other MCP servers you’re not using.
- Connected but no tools? Toggle the server off and on (or restart the tool) to re-fetch the tool list.