Connect and manage Twilio CPaaS provider with the Textmagic app
- Connect Twilio to Textmagic
- Set up call forwarding with Twilio
- Send messages via Twilio Sender ID
- Delivery issues and error messages
- Compliant texting with Twilio
Connect Twilio to Textmagic
Connecting Twilio with Textmagic as part of the Bring your own CPaaS service allows users to leverage the advanced business messaging features of the Textmagic app while maintaining the rates and numbers from their preferred CPaaS provider.
To connect Twilio to Textmagic, you need an active and compliant account with the provider and valid API credentials (Account SID & Auth token).
- Navigate to Messenger -> Messenger settings -> BYOC and click on the Connect a CPaaS provider button.
- Select Twilio from the list of providers -> Click Continue.
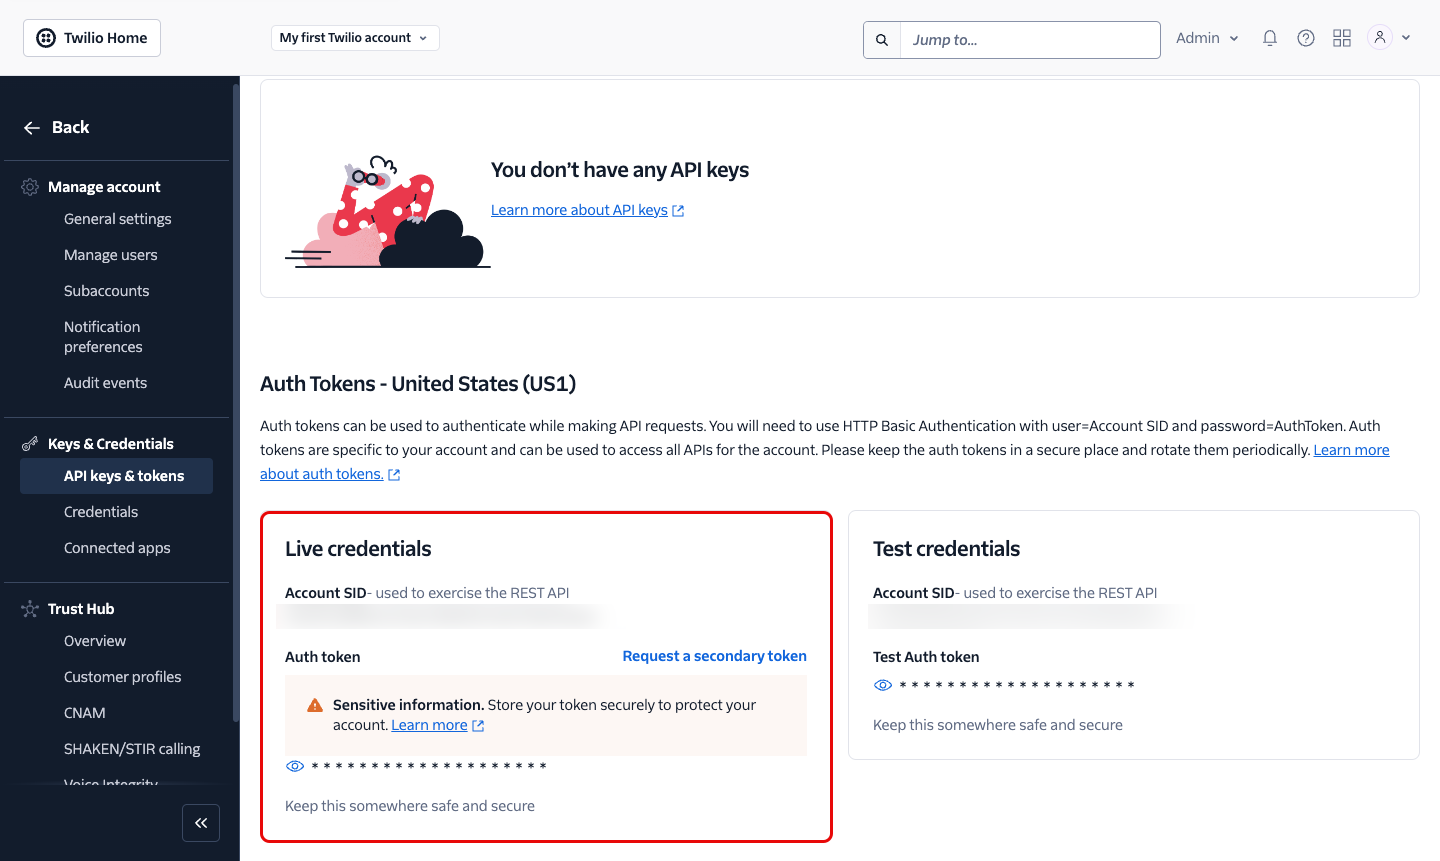
- Type your Twilio login credentials (Account SID & Auth token). You can find these in your Twilio Account Dashboard under Account Info or at Account management -> Keys & Credentials -> API keys & tokens.
- If you create a new API key for Textmagic, choose the Main type. Standard and Restricted API keys are not sufficient for integration.
- Select the virtual numbers you would like to connect to Textmagic. Add a label to organize them (this is optional), then click on the Link numbers button.
You have now successfully connected your Twilio account and virtual numbers to use with Textmagic.
To learn more about sending texts and managing provider and sender settings with Twilio, read our guide on how to use your CPaaS provider with the Textmagic app.
Set up call forwarding with Twilio
In the Textmagic web app, you can forward calls from your Twilio number to another number of your choice. Here’s how you can do this:
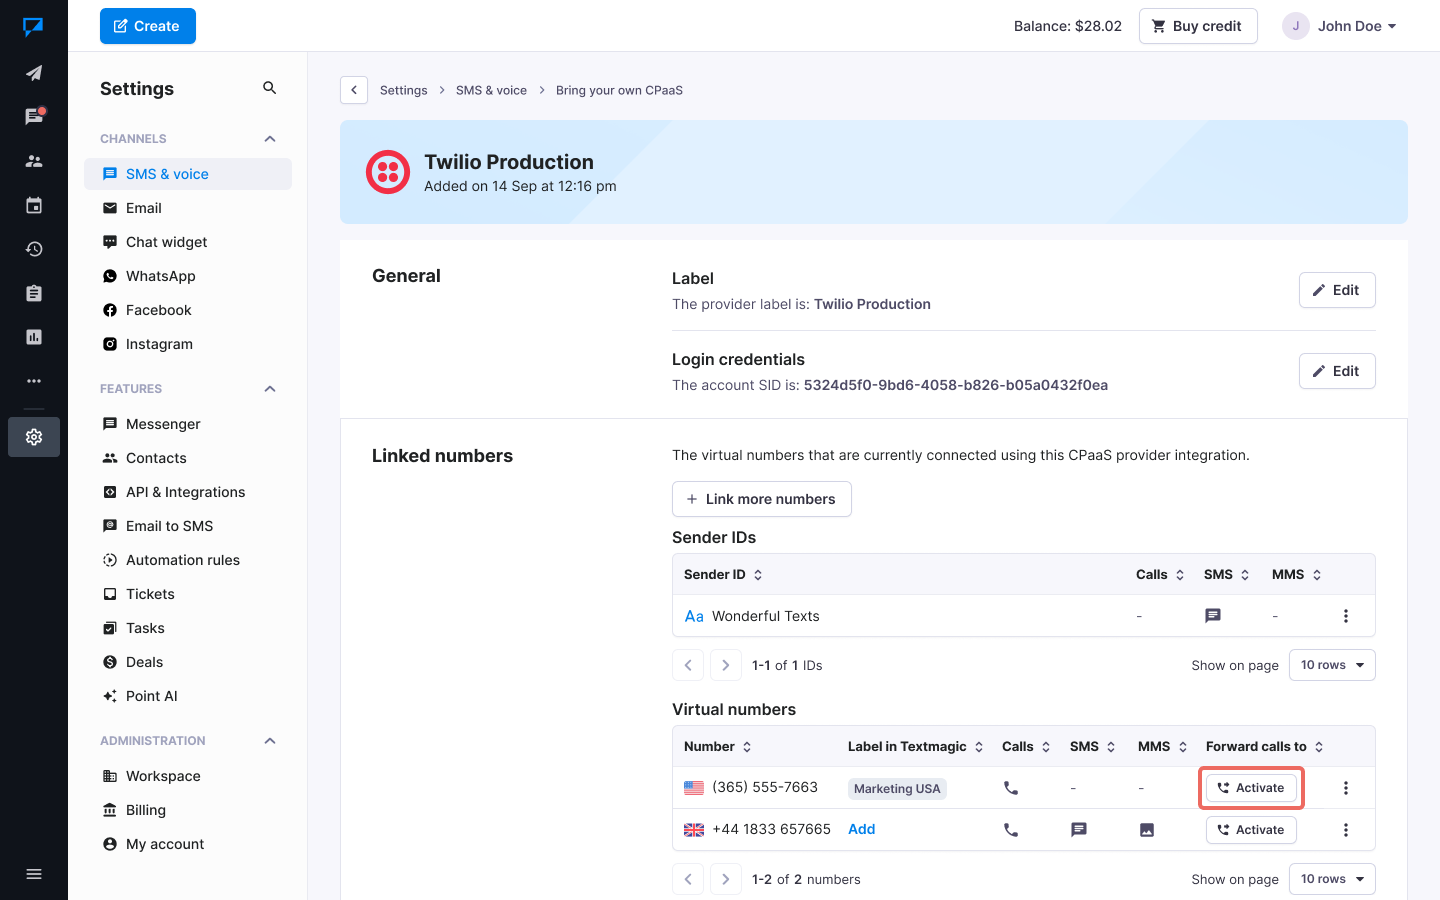
- Navigate to Messenger -> Messenger settings -> BYOC and click on the Twilio account where the desired number is.
- In the Linked numbers section, click on the Activate button next to the number you want to forward calls from.
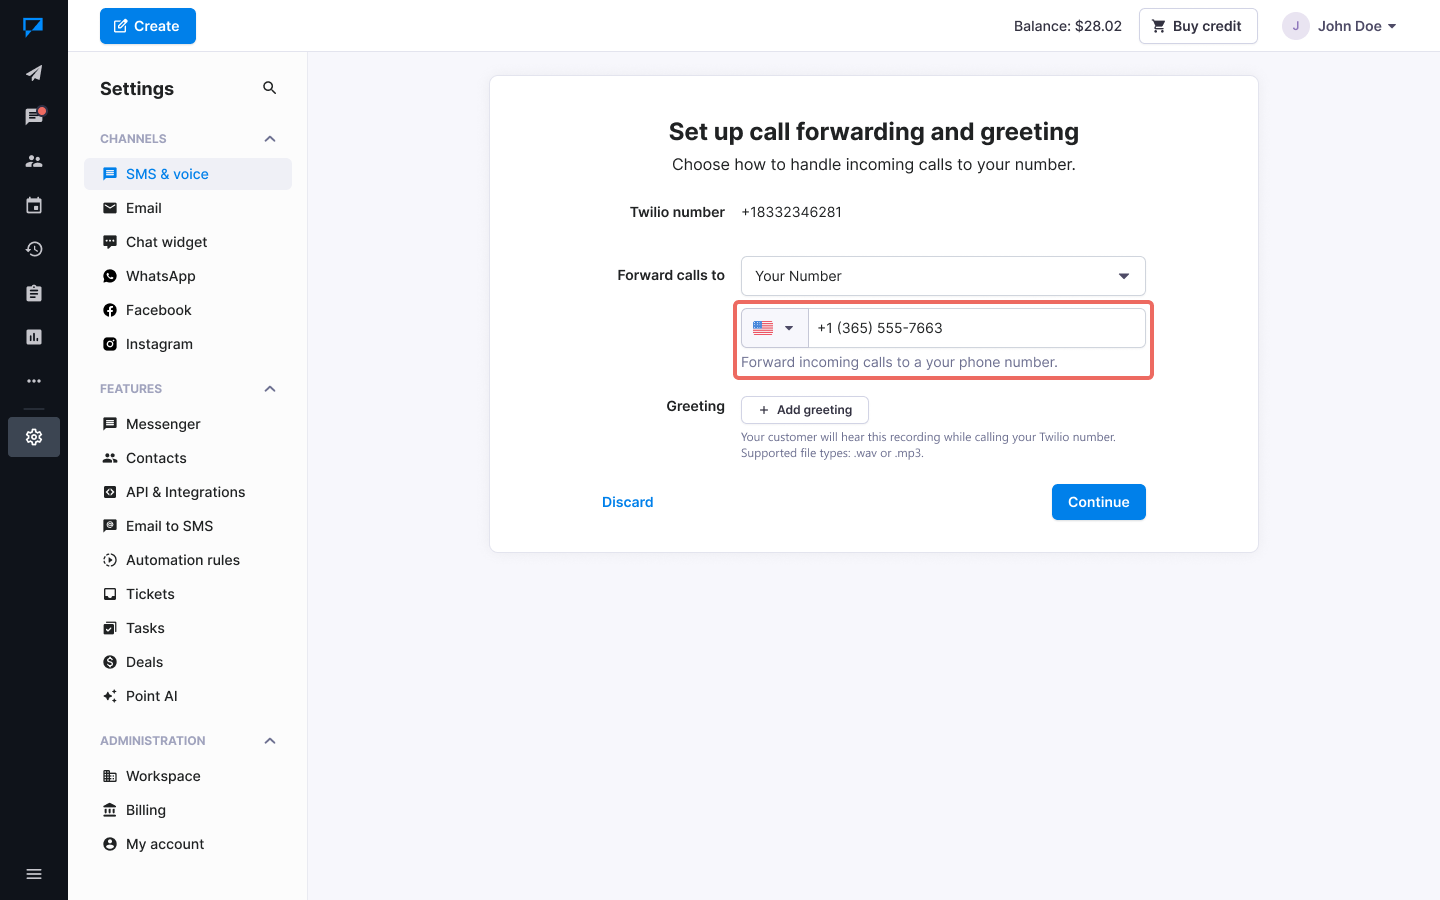
- From the Forward calls to dropdown, select Your number and enter the phone number to which you want to forward calls.
- Optionally, add an audio greeting for this number.
- Click Continue and revise your number selection -> click Finish to finalize call forwarding setup.
Send messages via Twilio Sender ID
Alphanumeric Sender ID allows you to send messages from a personalized Sender ID (e.g. your business name) instead of a phone number.
To create and connect your Twilio Sender ID to Textmagic, navigate to Messaging -> Services in your Twilio Account Dashboard and click on the Create Messaging Service button.
- In Step 1, input a name for your messaging service and select what you’ll use it for -> click Create Messaging Service.
- In Step 2, click on the Add Senders button. In the pop-up that opens, select Alpha Sender as your Sender Type -> click Continue.
- Define your Alpha Sender ID name and click on Add Alpha Sender.
- If you already have a verified Sender ID, select it from the list of existing Sender IDs.
- Your Sender ID can now be integrated with Textmagic. In your Textmagic account, follow the standard flow to connect your Twilio account. When linking numbers, you will now see Sender IDs in a separate table.
- If you’ve already connected Twilio to Textmagic, click on Link more numbers in the provider’s settings to select and link your Sender ID.
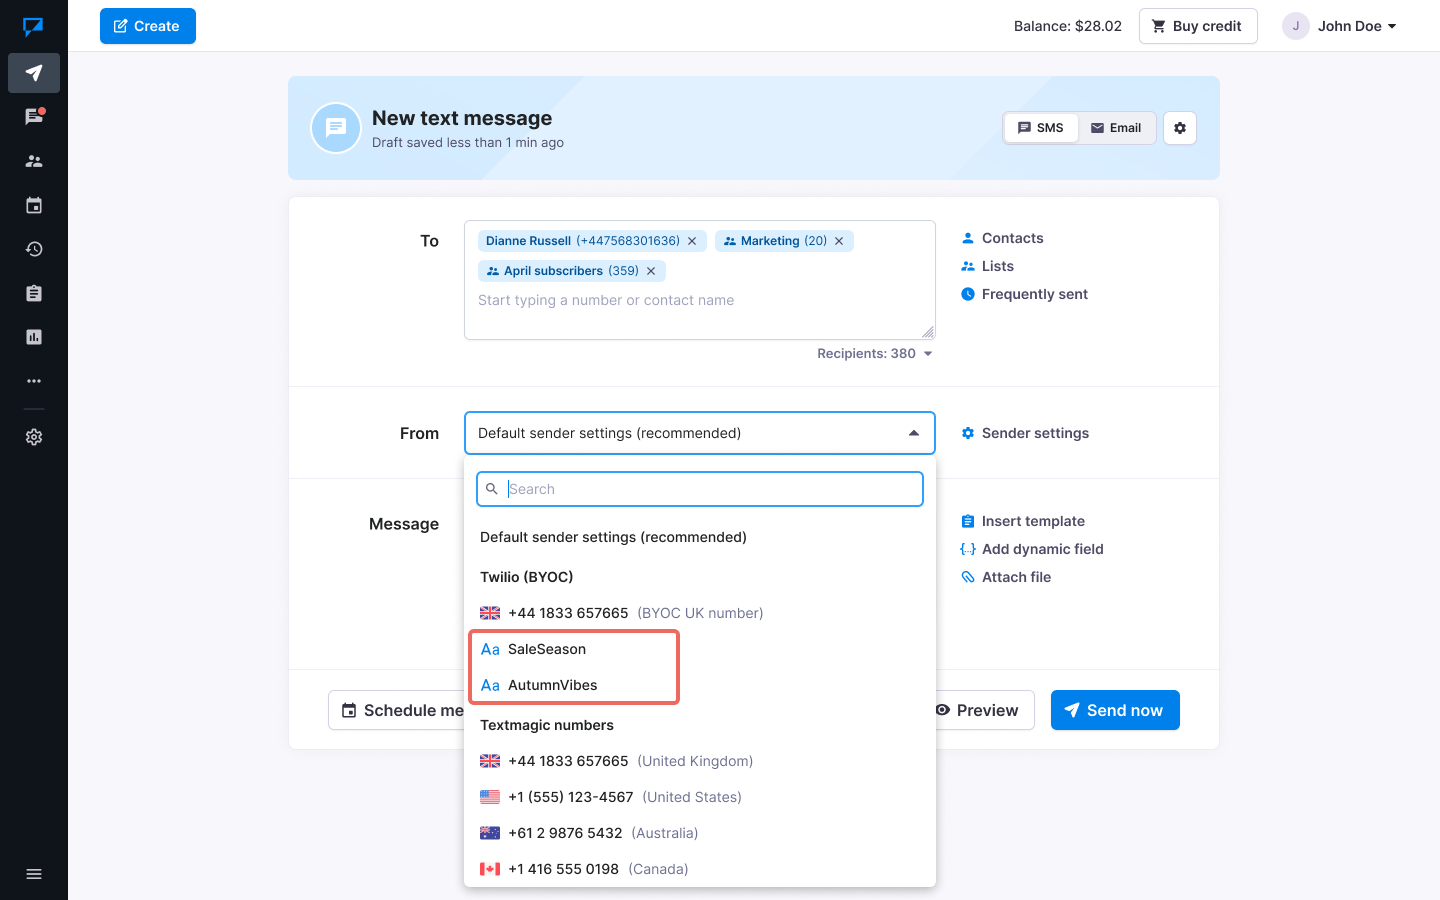
To send messages from your linked Twilio Sender ID, select it from the From dropdown on the Compose page.
Delivery issues and error messages
To check the delivery status of your messages, navigate to the History page in the Textmagic app. Here, you can see if your messages were delivered or rejected.
There are various possible reasons for a message to be rejected. Here are the main ones:
- You’re texting an unregistered number on a Twilio trial account;
- Your Twilio number is not toll-free or 10DLC verified;
- You’re trying to send a message to an unsupported country;
- You’re trying to send a message to a region not enabled in your Twilio account;
- Your message has been flagged as spam or contains prohibited terms;
- You don’t have enough balance in your Twilio account;
- You’ve exceeded the rate limit on your Twilio account.
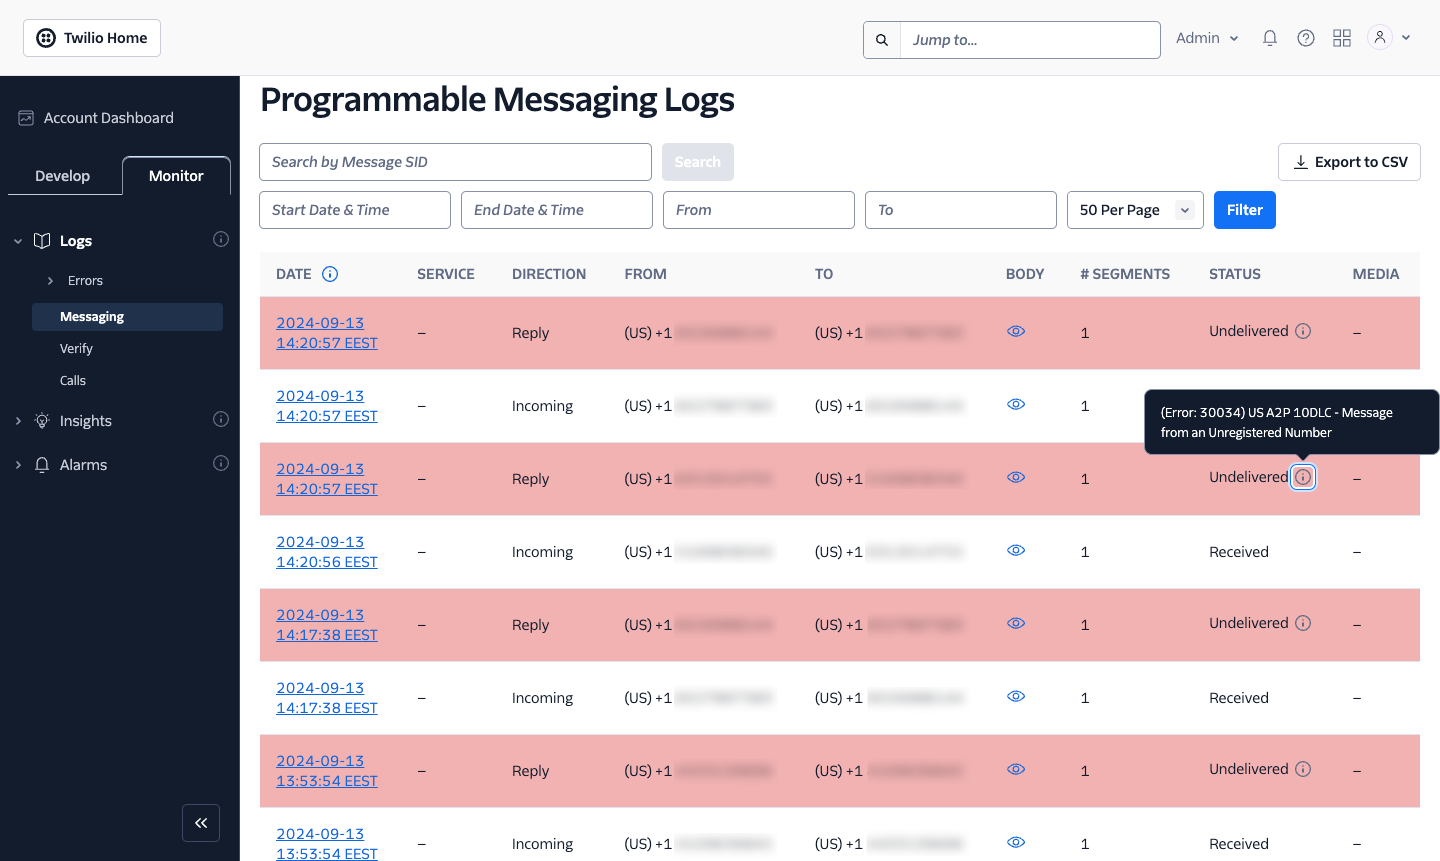
For more information on possible errors, please consult Twilio’s error and warning dictionary.
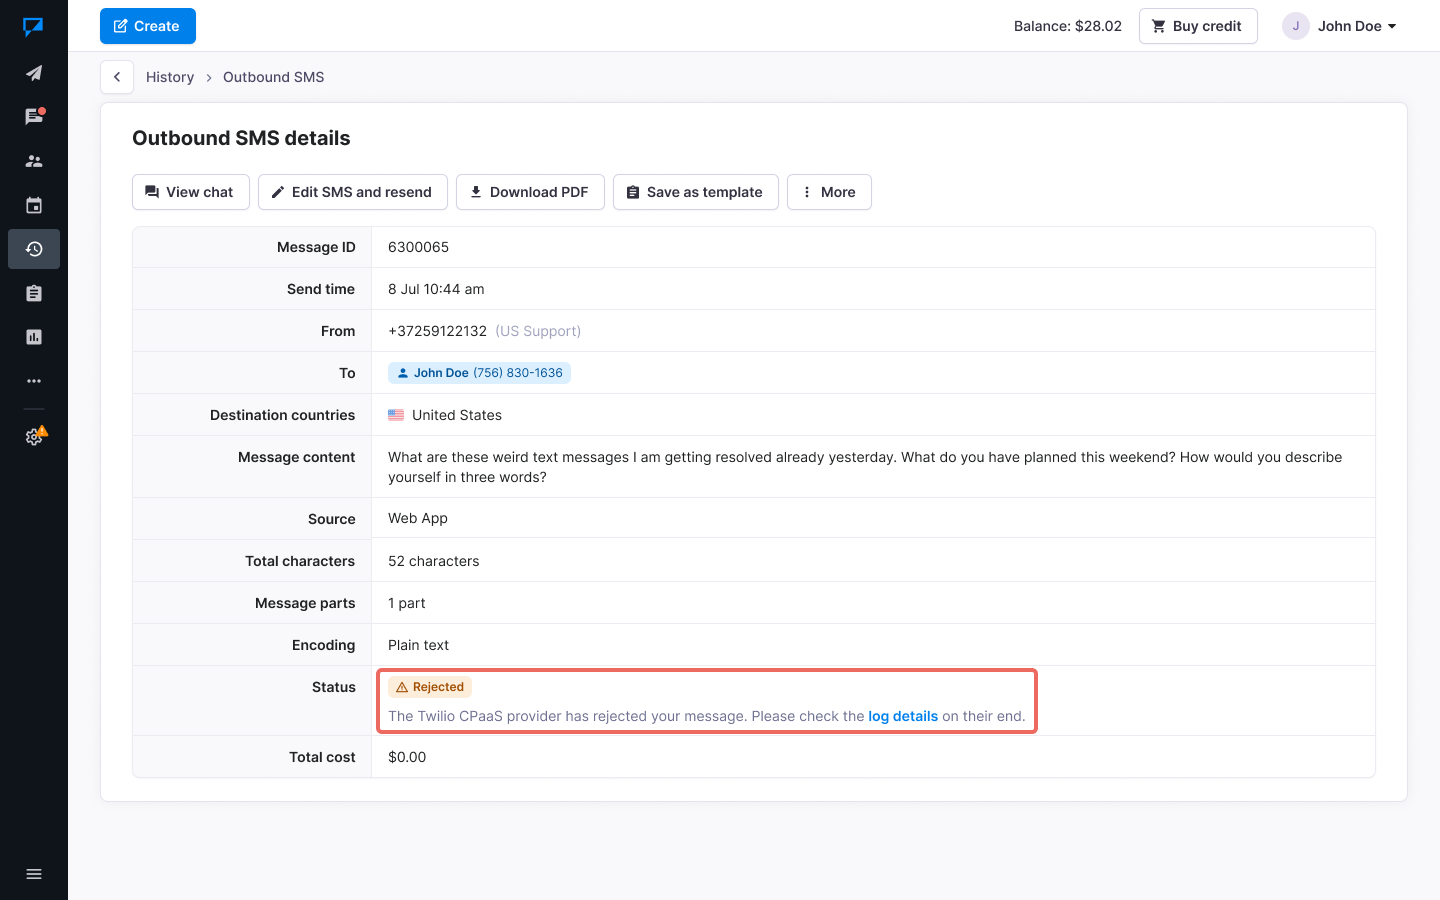
If this is the case, Textmagic will display Rejected or Failed in the Status column and inform you that Twilio has blocked your message. This error message will also direct you to check the provider’s log details to find out the reason for rejection and troubleshoot it.
Compliant texting with Twilio
Before connecting Twilio US toll-free and local numbers to Textmagic, ensure they meet all regulatory requirements. This is crucial for compliant texting, helping to maintain message deliverability, avoid potential carrier filtering or blocking, and prevent legal issues.
To do so, click View all numbers in the Account Info section of the main Twilio Account Dashboard.
- From the Phone Numbers section, navigate to Manage -> Active numbers.
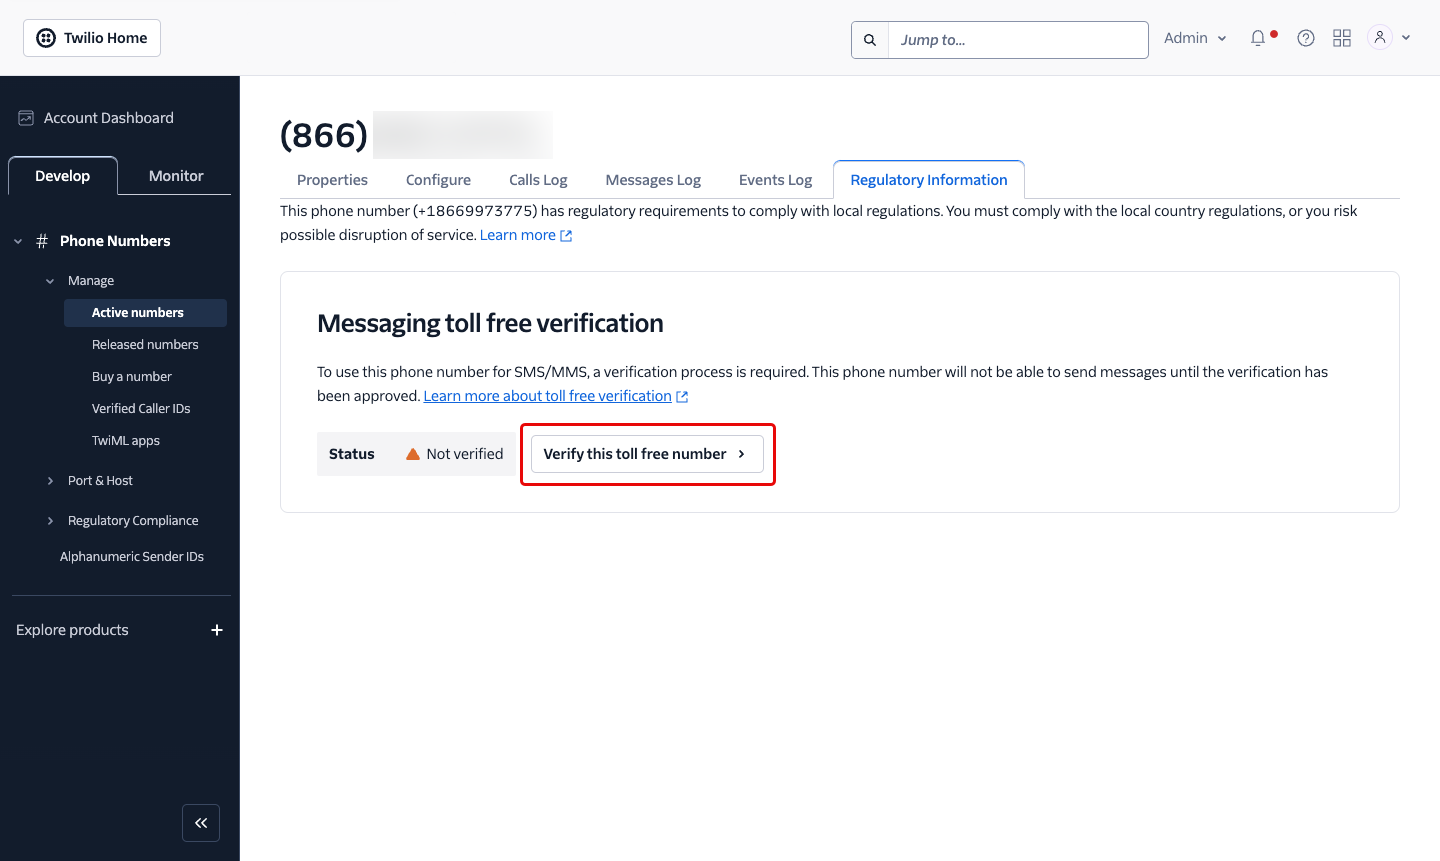
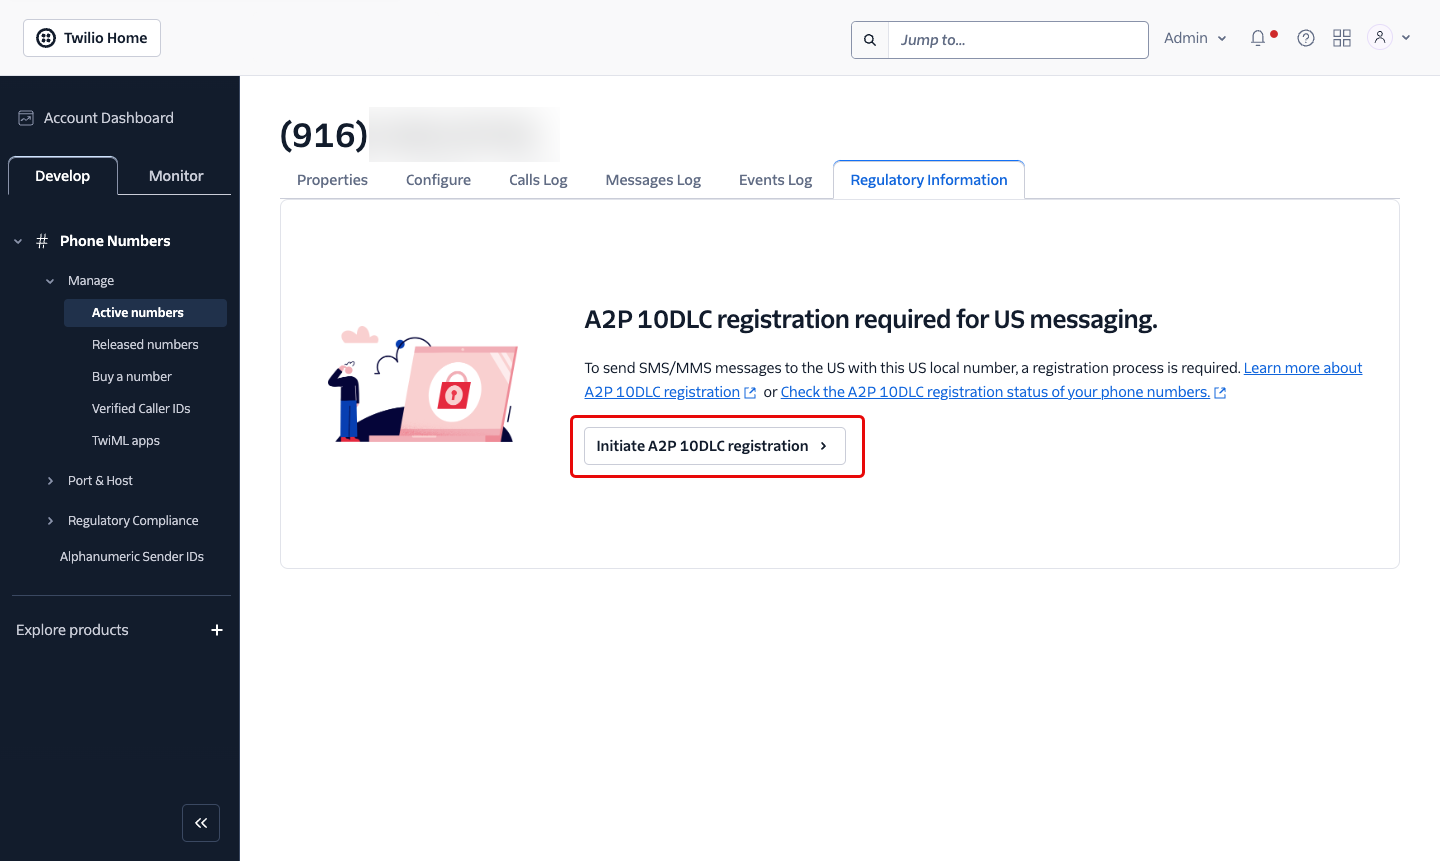
- Go to the Regulatory Information section to see if your number needs to undergo either toll-free verification or A2P 10DLC registration.
- Toll-free verification involves providing your business details, such as name and address, to confirm legitimacy.

- 10DLC registration requires submitting your brand and campaign information for approval, including use cases and message content details.
For more information on how verification works in the Twilio app, please consult the provider’s dedicated support guides on toll-free verification and A2P 10DLC registration.